Reference 编译出对应 FFmpeg 源码的 API doc 1、下载 doxygen
1 sudo apt-get install doxygen
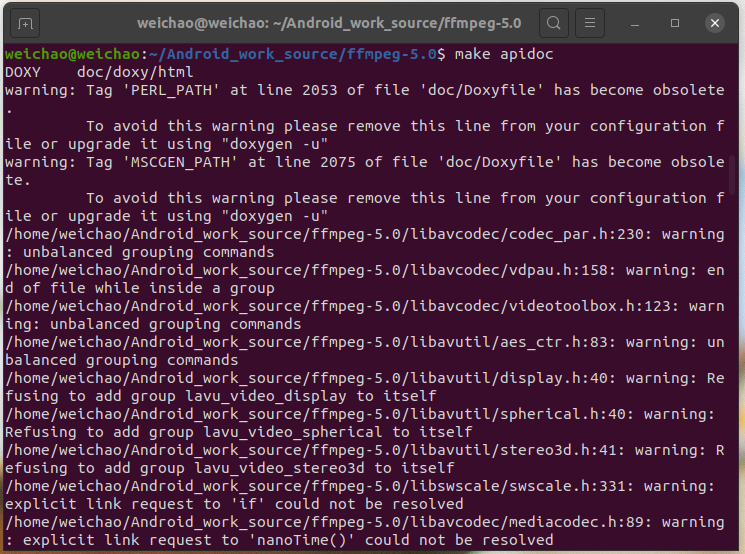
2、编译
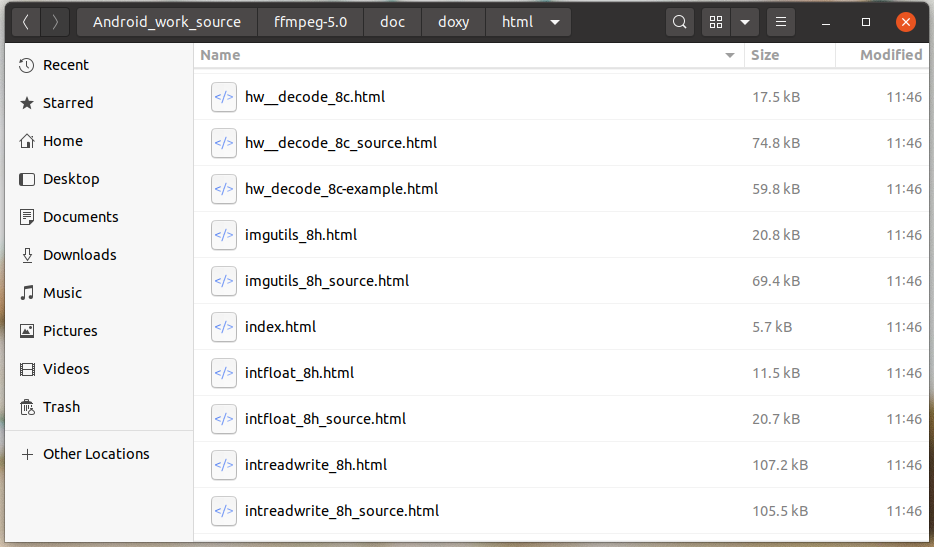
执行完成后在 ffmpeg-5.0/doc/doxy/html 目录内生成 html 形式的 doc,访问入口是 index.html。
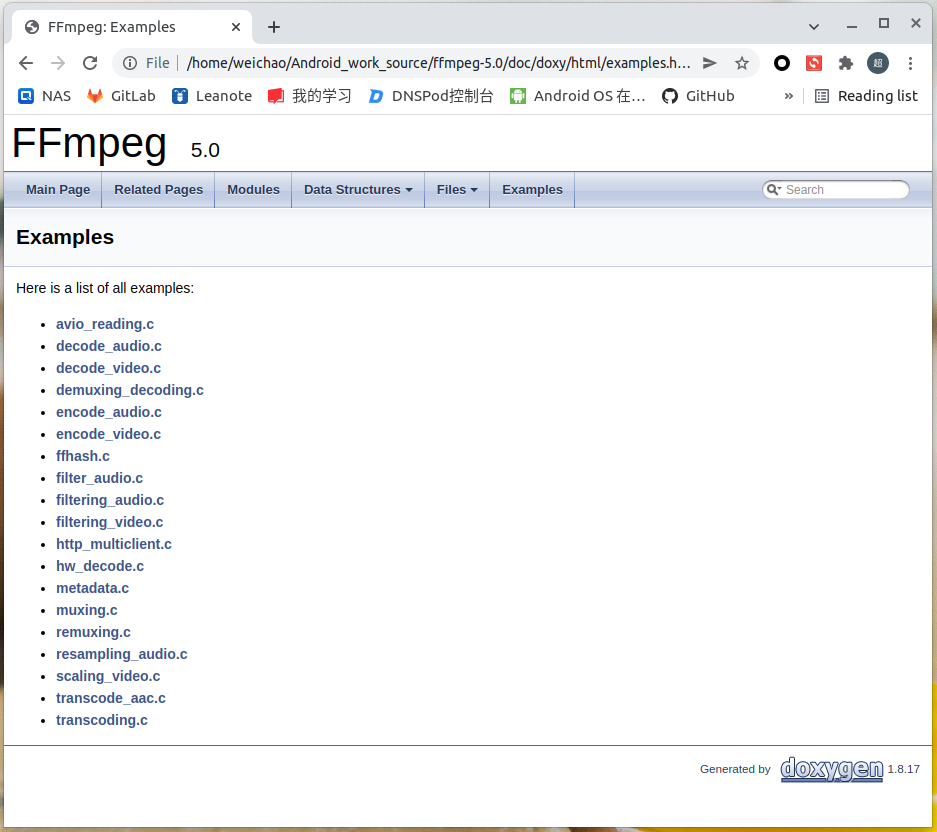
TODO Examples list 缺少:avio_list_dir、extract_mvs、qsvdec、vaapi_encode、vaapi_transcode,这些在 ffmpeg-5.0/doc/examples 可以找到。
3、编译好的 API docFFmpeg-5.0 doc
Examples (前例写过的 API 不会在后例中写)
avio_list_dir API example program to show how to list files in directory accessed through AVIOContext.
API 示例程序显示如何列出通过 AVIOContext 访问的目录中的文件。
打开输入的路径 1 2 3 4 AVIODirContext *ctx = NULL ;const char *input_dir = 不能为空;int ret = avio_open_dir(&ctx, input_dir, NULL );
关闭输入的路径 1 2 3 AVIODirContext *ctx = 不能为空;
错误信息转字符串 1 2 3 int ret = 不能为空;
打印信息 1 2 3 av_log(NULL , AV_LOG_INFO, "%-9s %12s %30s %10s %s %16s %16s %16s\n" ,"TYPE" , "SIZE" , "NAME" , "UID(GID)" , "UGO" , "MODIFIED" ,"ACCESSED" , "STATUS_CHANGED" );
读目录内的文件 1 2 3 4 AVIODirEntry *entry = NULL ;int ret = avio_read_dir(ctx, &entry);
释放对文件的引用 1 2 3 AVIODirEntry *entry = 不能为空;
获取文件模式(操作文件的权限) 1 2 3 4 5 6 7 8 AVIODirEntry *entry = 不能为空;char filemode[4 ];if (entry->filemode == -1 ) {snprintf (filemode, 4 , "???" );else {snprintf (filemode, 4 , "%3" PRIo64, entry->filemode);
获取 User ID 和 Group ID 1 2 3 4 AVIODirEntry *entry = 不能为空;char uid_and_gid[20 ];snprintf (uid_and_gid, 20 , "%" PRId64"(%" PRId64")" , entry->user_id, entry->group_id);
打印文件信息 1 2 3 4 5 6 7 8 9 10 11 12 13 14 15 16 17 18 19 20 21 22 23 24 25 26 27 28 static const char *type_string (int type) {switch (type) {case AVIO_ENTRY_DIRECTORY:return "<DIR>" ;case AVIO_ENTRY_FILE:return "<FILE>" ;case AVIO_ENTRY_BLOCK_DEVICE:return "<BLOCK DEVICE>" ;case AVIO_ENTRY_CHARACTER_DEVICE:return "<CHARACTER DEVICE>" ;case AVIO_ENTRY_NAMED_PIPE:return "<PIPE>" ;case AVIO_ENTRY_SYMBOLIC_LINK:return "<LINK>" ;case AVIO_ENTRY_SOCKET:return "<SOCKET>" ;case AVIO_ENTRY_SERVER:return "<SERVER>" ;case AVIO_ENTRY_SHARE:return "<SHARE>" ;case AVIO_ENTRY_WORKGROUP:return "<WORKGROUP>" ;case AVIO_ENTRY_UNKNOWN:default :break ;return "<UNKNOWN>" ;
1 2 3 4 5 6 7 8 9 10 11 12 13 AVIODirEntry *entry = 不能为空;char uid_and_gid[20 ] = 不能为空;char filemode[4 ] = 不能为空;NULL , AV_LOG_INFO, "%-9s %12" PRId64" %30s %10s %s %16" PRId64" %16" PRId64" %16" PRId64"\n" ,
avio_reading API example program to show how to read from a custom buffer accessed through AVIOContext.
API 示例程序显示如何从通过 AVIOContext 访问的自定义缓冲区中读取数据。
映射文件的内容到缓冲区 1 2 3 4 5 uint8_t *buffer = NULL ;size_t buffer_size;char *input_filename = 不能为空;int ret = av_file_map(input_filename, &buffer, &buffer_size, 0 , NULL );
取消映射文件的内容到缓冲区 1 2 3 4 uint8_t *buffer = 不能为空;size_t buffer_size = 不能为空;
创建 AVFormatContext 1 2 3 AVFormatContext *fmt_ctx = NULL ;
关闭 AVFormatContext 1 2 3 AVFormatContext *fmt_ctx = 不能为空;
创建缓冲区 1 2 3 4 uint8_t *avio_ctx_buffer = NULL ;size_t avio_ctx_buffer_size = 4096 ;uint8_t *) (av_malloc(avio_ctx_buffer_size));
释放缓冲区 1 2 if (avio_ctx)
创建 AVIOContext 1 2 3 4 struct buffer_data {uint8_t *ptr;size_t size;
1 2 3 4 5 6 7 8 9 10 11 12 13 14 15 static int read_packet (void *opaque, uint8_t *buf, int buf_size) {struct buffer_data *bd =struct buffer_data *) opaque;if (!buf_size)return AVERROR_EOF;"ptr:%p size:%zu\n" , bd->ptr, bd->size);memcpy (buf, bd->ptr, buf_size);return buf_size;
1 2 3 4 5 6 7 8 9 10 11 AVIOContext *avio_ctx = NULL ;uint8_t *avio_ctx_buffer = 不能为空;size_t avio_ctx_buffer_size = 4096 ;struct buffer_data bd =0 };0 , &bd, &read_packet, NULL , NULL );
后一个数组向前一个数组复制 n 个数据 1 2 3 4 struct buffer_data {uint8_t *ptr;size_t size;
1 2 3 4 5 6 7 struct buffer_data *bd =uint8_t *buf = 不能为空;int buf_size = 不能为空;memcpy (buf, bd->ptr, buf_size);
释放 AVIOContext 1 2 3 AVIOContext *avio_ctx = 不能为空;
建立 AVFormatContext 对 AVIOContext 的引用 1 2 3 4 AVFormatContext *fmt_ctx = 不能为空;
打开输入的文件 1 2 3 AVFormatContext *fmt_ctx = 不能为空;int ret = avformat_open_input(&fmt_ctx, NULL , NULL , NULL );
获取文件的流信息 1 2 3 AVFormatContext *fmt_ctx = 不能为空;int ret = avformat_find_stream_info(fmt_ctx, NULL );
打印输入或输出的详细信息 1 2 3 4 AVFormatContext *fmt_ctx = 不能为空;char *input_filename = 不能为空;0 , input_filename, 0 );
decode_audio audio decoding with libavcodec API example
使用 libavcodec API 进行音频解码示例
1 2 #define AUDIO_INBUF_SIZE 20480 #define AUDIO_REFILL_THRESH 4096
创建 AVPacket 1 AVPacket *pkt = av_packet_alloc();
释放 AVPacket 1 2 3 AVPacket *pkt = 不能为空;
获取指定的 AVCodec 1 const AVCodec *codec = avcodec_find_decoder(AV_CODEC_ID_MP2);
创建并初始化 AVCodecParserContext 1 2 3 const AVCodec *codec = 不能为空;
关闭 AVCodecParserContext 1 2 3 AVCodecParserContext *parser = 不能为空;
创建 AVCodecContext 1 2 3 const AVCodec *codec = 不能为空;
释放 AVCodecContext 1 2 3 AVCodecContext *c = 不能为空;
初始化 AVCodecContext For some codecs, such as msmpeg4 and mpeg4, width and height MUST be initialized there because this information is not available in the bitstream.
对于某些编解码器,例如 msmpeg4 和 mpeg4,必须在此处初始化宽度和高度,因为此信息在比特流中不可用。
1 2 3 4 5 6 7 8 9 10 11 AVCodecContext *c = 不能为空;const AVCodec *codec = 不能为空;int ret = avcodec_open2(c, codec, NULL );NULL ;"flags2" , "+export_mvs" , 0 );
释放 AVCodecContext 1 2 3 AVCodecContext *c = 不能为空;
释放 AVCodecContext 1 2 3 AVCodecContext *c = 不能为空;
打开文件 1 2 3 const char *filename;"rb" );
关闭文件 1 2 3 FILE *f = 不能为空;int ret = fclose(f);
读文件的内容 1 2 3 4 uint8_t inbuf[AUDIO_INBUF_SIZE + AV_INPUT_BUFFER_PADDING_SIZE];size_t data_size = fread(inbuf, 1 , AUDIO_INBUF_SIZE, f);
创建 AVFrame 1 AVFrame *decoded_frame = av_frame_alloc();
释放 AVFrame 1 2 3 AVFrame *decoded_frame = 不能为空;
解析数据包 1 2 3 4 5 6 7 8 9 10 11 12 13 14 15 16 AVCodecParserContext *parser = 不能为空;uint8_t *data = 不能为空;size_t data_size = 不能为空;int ret = av_parser_parse2(parser, c, &pkt->data, &pkt->size,0 );if (ret < 0 ) {"Error while parsing\n" );return 1 ;else "av_parser_parse2()" );
提供原始数据包数据作为解码器的输入 1 2 3 4 AVCodecContext *dec_ctx = 不能为空;int ret = avcodec_send_packet(dec_ctx, pkt);
获取解码器解码后的输出数据 1 2 3 4 AVCodecContext *dec_ctx = 不能为空;int ret = avcodec_receive_frame(dec_ctx, frame);
获取每个样本的字节数 1 2 3 AVCodecContext *dec_ctx = 不能为空;int data_size = av_get_bytes_per_sample(dec_ctx->sample_fmt);
写数据到文件 1 2 3 4 5 6 7 8 9 AVFrame *frame = 不能为空;int i, ch;int data_size = 不能为空;for (i = 0 ; i < frame->nb_samples; i++)for (ch = 0 ; ch < dec_ctx->channels; ch++)1 , data_size, outfile);
后一个数组向前一个数组复制 n 个数据 1 2 3 4 5 6 7 8 9 10 uint8_t inbuf[AUDIO_INBUF_SIZE + AV_INPUT_BUFFER_PADDING_SIZE];uint8_t *data = 不能为空;size_t data_size = 不能为空;1 ,if (len > 0 )
刷新解码器 1 2 3 4 5 6 AVPacket *pkt = 不能为空;NULL ;0 ;
检查样本格式是否是平面的 1 2 3 enum AVSampleFormat sfmt =int ret = av_sample_fmt_is_planar(sfmt);
获取样本格式名称 1 2 3 enum AVSampleFormat sfmt =const char *packed = av_get_sample_fmt_name(sfmt);
获取样本格式的打包 1 2 3 enum AVSampleFormat sfmt =
获取 ffplay 时的参数 1 2 3 4 5 6 7 8 9 10 11 12 13 14 15 16 17 18 19 20 21 22 23 24 25 26 27 28 static int get_format_from_sample_fmt (const char **fmt, enum AVSampleFormat sample_fmt) {int i;struct sample_fmt_entry {enum AVSampleFormat sample_fmt ;const char *fmt_be, *fmt_le;"u8" , "u8" },"s16be" , "s16le" },"s32be" , "s32le" },"f32be" , "f32le" },"f64be" , "f64le" },NULL ;for (i = 0 ; i < FF_ARRAY_ELEMS(sample_fmt_entries); i++) {struct sample_fmt_entry *entry =if (sample_fmt == entry->sample_fmt) {return 0 ;"sample format %s is not supported as output format\n" ,return -1 ;
1 2 3 4 const char *fmt;enum AVSampleFormat sfmt =int ret = get_format_from_sample_fmt(&fmt, sfmt);
decode_video video decoding with libavcodec API example
使用 libavcodec API 进行视频解码示例
And check your input file is encoded by mpeg1video please.
请检查您的输入文件是否由 mpeg1video 编码。
创建 AVPacket 1 AVPacket *pkt = av_packet_alloc();
将缓冲区的结尾设置为 0 这可确保损坏的 MPEG 流不会发生过度读取
1 2 3 uint8_t inbuf[INBUF_SIZE + AV_INPUT_BUFFER_PADDING_SIZE];memset (inbuf + INBUF_SIZE, 0 , AV_INPUT_BUFFER_PADDING_SIZE);
输出缓冲区中的数据 刷新解码器 1 2 3 AVCodecContext *dec_ctx = 不能为空;int ret = avcodec_send_packet(dec_ctx, NULL );
demuxing_decoding API example program to show how to read frames from an input file.
API 示例程序,展示如何从输入文件中读取帧。
打开输入的文件 1 2 3 4 static AVFormatContext *fmt_ctx = NULL ;static const char *src_filename = 不能为空;int ret = avformat_open_input(&fmt_ctx, src_filename, NULL , NULL );
获取最佳流 1 2 3 4 5 6 7 8 9 10 11 12 13 14 AVFormatContext *fmt_ctx = 不能为空;enum AVMediaType type =int ret, stream_index;-1 , -1 , NULL , 0 );if (ret < 0 ) {"Could not find %s stream in input file '%s'\n" ,return ret;else {
获取指定的 AVCodec 1 2 3 AVStream *st = 不能为空;const AVCodec *dec = avcodec_find_decoder(st->codecpar->codec_id);
覆盖 AVCodecContext 对应的参数 1 2 3 4 AVCodecContext **dec_ctx = 不能为空;int ret = avcodec_parameters_to_context(*dec_ctx, st->codecpar);
创建图像缓冲区 1 2 3 4 5 6 7 8 9 10 11 12 13 14 15 static uint8_t *video_dst_data[4 ] = {NULL };static int video_dst_linesize[4 ];static int width = 不能为空;static int height = 不能为空;static enum AVPixelFormat pix_fmt =static int video_dst_bufsize;int ret = av_image_alloc(video_dst_data, video_dst_linesize,1 );if (ret < 0 ) {"Could not allocate raw video buffer\n" );goto end;else "av_image_alloc()" );
循环读数据到 AVPacket,读成功后调用解码函数进行解码 1 2 3 4 5 6 7 8 9 10 11 12 13 AVFormatContext *fmt_ctx = 不能为空;static AVPacket *pkt = NULL ;while (av_read_frame(fmt_ctx, pkt) >= 0 ) {if (pkt->stream_index == video_stream_idx)else if (pkt->stream_index == audio_stream_idx)if (ret < 0 )break ;
复制图像 1 2 3 4 5 6 7 8 9 10 11 static uint8_t *video_dst_data[4 ] = {NULL };static int video_dst_linesize[4 ];static enum AVPixelFormat pix_fmt =static int width = 不能为空;static int height = 不能为空;const uint8_t **) (frame->data), frame->linesize,
刷新解码器 1 2 3 4 if (video_dec_ctx)NULL );if (audio_dec_ctx)NULL );
encode_audio 获取指定的 AVCodec 1 const AVCodec *codec = avcodec_find_encoder(AV_CODEC_ID_MP2);
获取通道数 1 2 3 4 5 const AVCodec *codec = 不能为空;const uint64_t *p;int nb_channels = av_get_channel_layout_nb_channels(*p);
创建缓冲区 1 2 3 AVFrame *frame = 不能为空;int ret = av_frame_get_buffer(frame, 0 );
确保帧数据可写 确保帧数据是可写的。
1 2 3 AVFrame *frame = 不能为空;int ret = av_frame_make_writable(frame);
提供原始视频或音频帧作为编码器的输入 1 2 3 4 AVCodecContext *ctx = 不能为空;int ret = avcodec_send_frame(ctx, frame);
从编码器返回编码后的输出数据 1 2 3 4 AVCodecContext *ctx = 不能为空;int ret = avcodec_receive_packet(ctx, pkt);
刷新编码器 1 2 3 4 5 6 AVCodecContext *c = 不能为空;NULL , pkt, f);
encode_video 获取指定的 AVCodec 1 2 3 const char *codec_name = 不能为空;const AVCodec *codec = avcodec_find_encoder_by_name(codec_name);
给参数赋值 1 2 3 AVCodecContext *c = 不能为空;int ret = av_opt_set(c->priv_data, "preset" , "slow" , 0 );
添加序列结束代码,以获得真正的 MPEG 文件 之所以有意义,是因为这个小示例直接写入数据包。这称为“基本流”,仅适用于某些编解码器。
1 2 3 4 5 const AVCodec *codec = 不能为空;uint8_t endcode[] = {0 , 0 , 1 , 0xb7 };if (codec->id == AV_CODEC_ID_MPEG1VIDEO || codec->id == AV_CODEC_ID_MPEG2VIDEO)1 , sizeof (endcode), f);
获取边数据 1 2 3 4 5 6 7 8 9 10 11 12 13 14 static AVFrame *frame = 不能为空;int i;if (sd) {const AVMotionVector *mvs = (const AVMotionVector *) sd->data;for (i = 0 ; i < sd->size / sizeof (*mvs); i++) {const AVMotionVector *mv = &mvs[i];printf ("%d,%2d,%2d,%2d,%4d,%4d,%4d,%4d,0x%" PRIx64"\n" ,
ffhash This example is a simple command line application that takes one or more arguments. It demonstrates a typical use of the hashing API with allocation, initialization, updating, and finalizing.
此示例是一个简单的命令行应用程序,它采用一个或多个参数。 它演示了哈希 API 的典型用法,包括分配、初始化、更新和完成。
获取支持的 hash 算法 1 2 3 4 5 6 7 8 9 10 int i = 0 ;const char *name;"usage: ffhash [b64:]algorithm [input]...\n" );"Supported hash algorithms:" );do {if (name)" %s" , name);while (name);
获取指定的位置 1 2 3 const char *hash_name = 不能为空;static int out_b64 = av_strstart(hash_name, "b64:" , &hash_name);
创建 AVHashContext 1 2 3 4 static struct AVHashContext *hash ;const char *hash_name = 不能为空;int ret = av_hash_alloc(&hash, hash_name);
初始化 AVHashContext 1 2 3 static struct AVHashContext *hash =
更新 AVHashContext 1 2 3 4 static struct AVHashContext *hash =uint8_t buffer[SIZE];
释放 AVHashContext 1 2 3 static struct AVHashContext *hash ;
打开文件 1 2 3 4 char *file = 不能为空;int flags = O_RDONLY;int fd = open(file, flags);
关闭文件 1 2 3 int fd = 不能为空;int ret = close(fd);
获取 hash 算法名 1 2 3 static struct AVHashContext *hash =
hash 值转字符串 1 2 3 4 5 6 7 8 9 10 11 static struct AVHashContext *hash =static int out_b64 = 不能为空;char res[2 * AV_HASH_MAX_SIZE + 4 ];if (out_b64) {uint8_t *) res, sizeof (res));"b64:%s" , res);else {uint8_t *) res, sizeof (res));"0x%s" , res);
filter_audio This example will generate a sine wave audio, pass it through a simple filter chain, and then compute the MD5 checksum of the output data.
这个例子将生成一个正弦波音频,通过一个简单的过滤器链,然后计算输出数据的 MD5 校验和。
1 2 3 4 5 #define INPUT_SAMPLERATE 48000 #define INPUT_FORMAT AV_SAMPLE_FMT_FLTP #define INPUT_CHANNEL_LAYOUT AV_CH_LAYOUT_5POINT0 #define VOLUME_VAL 0.90
字符串转 float 1 2 3 char *argv[] = 不能为空;float duration = atof(argv[1 ]);
创建 AVMD5 1 struct AVMD5 *md5 =
初始化 AVMD5 1 2 3 struct AVMD5 *md5 =
计算 MD5 值 1 2 3 4 5 6 7 8 AVFrame *frame = 不能为空;int planar = av_sample_fmt_is_planar((enum AVSampleFormat) frame->format);int channels = av_get_channel_layout_nb_channels(frame->channel_layout);int bps = av_get_bytes_per_sample((enum AVSampleFormat) frame->format);int plane_size = bps * frame->nb_samples * (planar ? 1 : channels);uint8_t checksum[16 ];
创建 AVFilterGraph 1 AVFilterGraph *filter_graph = avfilter_graph_alloc();
释放 AVFilterGraph 1 2 3 AVFilterGraph *graph = 不能为空;
获取指定的 AVFilter 1 const AVFilter *abuffer = avfilter_get_by_name("abuffer" );
创建 AVFilterContext 1 2 3 4 AVFilterGraph *filter_graph = 不能为空;const AVFilter *abuffer = 不能为空;"src" );
获取通道布局的描述 1 2 3 uint8_t ch_layout[64 ];char *) ch_layout, sizeof (ch_layout), 0 , INPUT_CHANNEL_LAYOUT);
设置 AVFilterContext 的参数 1 2 3 4 5 6 7 AVFilterContext *abuffer_ctx = 不能为空;uint8_t ch_layout[64 ] = 不能为空;"channel_layout" , (char *) ch_layout, AV_OPT_SEARCH_CHILDREN);"sample_fmt" , av_get_sample_fmt_name(INPUT_FORMAT), AV_OPT_SEARCH_CHILDREN);"time_base" , (AVRational) {1 , INPUT_SAMPLERATE}, AV_OPT_SEARCH_CHILDREN);"sample_rate" , INPUT_SAMPLERATE, AV_OPT_SEARCH_CHILDREN);
1 2 3 4 5 AVFilterContext *buffersink_ctx = 不能为空;static const enum AVSampleFormat out_sample_fmts [] =enum AVSampleFormat) -1 };int ret = av_opt_set_int_list(buffersink_ctx, "sample_fmts" , out_sample_fmts, -1 ,
初始化 AVFilterContext 1 2 3 AVFilterContext *abuffer_ctx = 不能为空;int ret = avfilter_init_str(abuffer_ctx, NULL );
1 2 3 4 AVFilterContext *volume_ctx = 不能为空;int ret = avfilter_init_dict(volume_ctx, &options_dict);
1 2 3 4 5 6 7 8 AVFilterContext *aformat_ctx = 不能为空;uint8_t options_str[1024 ];snprintf ((char *) options_str, sizeof (options_str),"sample_fmts=%s:sample_rates=%d:channel_layouts=0x%" PRIx64,44100 ,uint64_t ) AV_CH_LAYOUT_STEREO);int ret = avfilter_init_str(aformat_ctx, (char *) options_str);
转字符串 1 const char *value = AV_STRINGIFY(VOLUME_VAL);
释放 AVDictionary 1 2 3 AVDictionary *options_dict = 不能为空;
链接过滤器 1 2 3 4 AVFilterContext *aformat_ctx = 不能为空;int ret = avfilter_link(abuffer_ctx, 0 , volume_ctx, 0 );
配置图 1 2 3 AVFilterGraph *filter_graph = 不能为空;int ret = avfilter_graph_config(filter_graph, NULL );
将帧发送到 AVFilterGraph 的输入 1 2 3 4 AVFilterContext *src = 不能为空;int ret = av_buffersrc_add_frame(src, frame);
获取 AVFilterGraph 的输出 1 2 3 4 AVFilterContext *sink = 不能为空;int ret = av_buffersink_get_frame(sink, frame);
释放对 AVFrame 的引用 1 2 3 AVFrame *frame = 不能为空;
filtering_audio API example for audio decoding and filtering
用于音频解码和过滤的 API 示例
1 static const char *audio_filter_descr = "aresample=8000,aformat=sample_fmts=s16:channel_layouts=mono" ;
创建 AVFilterInOut 1 AVFilterInOut *outputs = avfilter_inout_alloc();
释放 AVFilterInOut 1 2 3 AVFilterInOut *outputs = 不能为空;
获取指定数量频道的默认频道布局 1 2 3 static AVCodecContext *dec_ctx = 不能为空;
创建过滤器并添加到图中 1 2 3 4 5 6 7 8 9 10 11 12 13 14 AVFilterContext *buffersrc_ctx = 不能为空;const AVFilter *abuffersrc = 不能为空;char args[512 ];static AVCodecContext *dec_ctx = 不能为空;snprintf (args, sizeof (args),"time_base=%d/%d:sample_rate=%d:sample_fmt=%s:channel_layout=0x%" PRIx64,int ret = avfilter_graph_create_filter(&buffersrc_ctx, abuffersrc, "in" ,NULL , filter_graph);
设置 AVFilterInOut 的参数 1 2 3 4 5 6 7 8 9 AVFilterInOut *outputs = 不能为空;"in" );0 ;NULL ;
1 2 3 4 5 6 7 8 9 AVFilterInOut *inputs = 不能为空;"out" );0 ;NULL ;
添加图 1 2 3 4 5 6 7 AVFilterGraph *filter_graph = 不能为空;const char *filters_descr = 不能为空;int ret = avfilter_graph_parse_ptr(filter_graph, filters_descr,NULL )
将帧添加到缓冲区源 1 2 3 4 AVFilterContext *buffersrc_ctx = 不能为空;int ret = av_buffersrc_add_frame_flags(buffersrc_ctx, frame, AV_BUFFERSRC_FLAG_KEEP_REF);
filtering_video API example for decoding and filtering
用于解码和过滤的 API 示例
睡眠一段时间 1 2 3 4 5 6 7 const AVFrame *frame = 不能为空;int64_t delay = av_rescale_q(frame->pts - last_pts,if (delay > 0 && delay < 1000000 )
将视频中的像素点替换成字符,然后从终端输出 1 2 3 4 5 6 7 8 9 10 11 12 13 14 15 const AVFrame *frame = 不能为空;int x, y;uint8_t *p0, *p;0 ];puts ("\033c" );for (y = 0 ; y < frame->height; y++) {for (x = 0 ; x < frame->width; x++)putchar (" .-+#" [*(p++) / 52 ]);putchar ('\n' );0 ];stdout );
http_multiclient API example program to serve http to multiple clients.
为多个客户端提供 http 服务的 API 示例程序。
创建并初始化服务端 AVIOContext 1 2 3 4 5 AVDictionary *options = 不能为空;const char *out_uri = 不能为空;int ret = avio_open2(&server, out_uri, AVIO_FLAG_WRITE, NULL , &options);
接受并创建客户端 AVIOContext 1 2 3 4 AVIOContext *client = NULL ;int ret = avio_accept(server, &client);
刷新 AVIOContext 1 2 3 AVIOContext *client = 不能为空;
关闭 AVIOContext 1 2 3 AVIOContext *server = 不能为空;int ret = avio_close(server);
1 2 3 AVFormatContext *ofmt_ctx = 不能为空;
创建进程 HTTP 握手 1 2 3 AVIOContext *client = 不能为空;int ret = avio_handshake(client);
获取指定参数的值 1 2 3 4 AVIOContext *client = 不能为空;uint8_t *resource = NULL ;int ret = av_opt_get(client, "resource" , AV_OPT_SEARCH_CHILDREN, &resource);
打开指定的文件 1 2 3 4 AVIOContext *input = NULL ;const char *in_uri = 不能为空;int ret = avio_open2(&input, in_uri, AVIO_FLAG_READ, NULL , NULL )
循环读,并发给客户端,直到读完 1 2 3 4 5 6 7 8 9 10 11 12 13 14 15 16 17 AVIOContext *input = 不能为空;uint8_t buf[1024 ];int n;for (;;) {sizeof (buf));if (n < 0 ) {if (n == AVERROR_EOF)break ;"Error reading from input: %s.\n" ,break ;
hw_decode HW-Accelerated decoding example.
硬件加速解码示例。
获取指定的 AVHWDeviceType 1 2 3 char *argv[] = 不能为空;enum AVHWDeviceType type =1 ]);
遍历受支持的 AVHWDeviceType 1 2 3 enum AVHWDeviceType type =
获取 AVHWDeviceType 的字符串名称 1 2 3 enum AVHWDeviceType type =const char * str = av_hwdevice_get_type_name(type);
获取 AVCodec 支持的硬件配置 1 2 3 4 const AVCodec *decoder = 不能为空;int i;const AVCodecHWConfig *config = avcodec_get_hw_config(decoder, i);
打开指定类型的设备,并创建 AVCodecContext 1 2 3 4 5 static AVBufferRef *hw_device_ctx = 不能为空;enum AVHWDeviceType type =int err = av_hwdevice_ctx_create(&hw_device_ctx, type,NULL , NULL , 0 );
创建新的引用 1 2 3 static AVBufferRef *hw_device_ctx = 不能为空;
释放引用 1 2 3 static AVBufferRef *hw_device_ctx = 不能为空;
在不同硬件之间复制数据 1 2 3 4 AVFrame *frame = 不能为空;int ret = av_hwframe_transfer_data(sw_frame, frame, 0 );
获取所需的内存大小 1 2 3 4 AVFrame *tmp_frame = 不能为空;int size = av_image_get_buffer_size((enum AVPixelFormat) tmp_frame->format, tmp_frame->width,1 );
复制数据到缓冲区 1 2 3 4 5 6 7 8 uint8_t *buffer = 不能为空;int size = 不能为空;int ret = av_image_copy_to_buffer(buffer, size,const uint8_t *const *) tmp_frame->data,const int *) tmp_frame->linesize, (enum AVPixelFormat) tmp_frame->format,1 );
example program to demonstrate the use of the libavformat metadata API.
示例程序来演示 libavformat 元数据 API 的使用。
获取 AVDictionaryEntry 1 const AVDictionaryEntry *tag = av_dict_get(fmt_ctx->metadata, "" , tag, AV_DICT_IGNORE_SUFFIX);
muxing API example program to output a media file with libavformat.
使用 libavformat 输出媒体文件的 API 示例程序。
1 2 3 4 5 #define STREAM_DURATION 10.0 #define STREAM_FRAME_RATE 25 #define STREAM_PIX_FMT AV_PIX_FMT_YUV420P #define SCALE_FLAGS SWS_BICUBIC
比较两个字符串的值 1 2 3 char **argv = 不能为空;int ret = strcmp (argv[i], "-flags" );
创建输出的 AVFormatContext 1 2 3 4 AVFormatContext *oc;const char *filename = 不能为空;int ret = avformat_alloc_output_context2(&oc, NULL , NULL , filename);
释放 AVFormatContext 1 2 3 AVFormatContext *oc = 不能为空;
获取 AVCodec 的字符串名称 1 2 3 enum AVCodecID codec_id =const char *codec = avcodec_get_name(codec_id);
创建 AVStream 1 2 3 AVFormatContext *oc = 不能为空;NULL );
复制 AVDictionary 1 2 3 4 AVDictionary *opt_arg = 不能为空;NULL ;int ret = av_dict_copy(&opt, opt_arg, 0 );
设置 AVCodecParameters 的值 1 2 3 4 OutputStream *ost = 不能为空;int ret = avcodec_parameters_from_context(ost->st->codecpar, c);
创建 SwrContext 1 2 3 OutputStream *ost = 不能为空;
释放 SwrContext 1 2 3 OutputStream *ost = 不能为空;
设置 SwrContext 的参数 1 2 3 OutputStream *ost = 不能为空;int ret = av_opt_set_sample_fmt(ost->swr_ctx, "in_sample_fmt" , AV_SAMPLE_FMT_S16, 0 );
初始化 SwrContext 1 2 3 OutputStream *ost = 不能为空;int ret = swr_init(ost->swr_ctx);
创建 AVIOContext 1 2 3 4 AVFormatContext *oc = 不能为空;const char *filename = 不能为空;int ret = avio_open(&oc->pb, filename, AVIO_FLAG_WRITE);
写文件头 1 2 3 4 AVFormatContext *oc = 不能为空;int ret = avformat_write_header(oc, &opt);
比较时间戳 1 2 3 4 OutputStream video_st = {0 }, audio_st = {0 };int ret = av_compare_ts(video_st.next_pts, video_st.enc->time_base,
创建 SwsContext 1 2 3 4 5 6 7 AVCodecContext *c = 不能为空;struct SwsContext *sws_ctx =NULL , NULL , NULL );
释放 SwsContext 1 2 3 OutputStream *ost = 不能为空;
缩放 1 2 3 4 5 6 OutputStream *ost = 不能为空;int ret = sws_scale(ost->sws_ctx, (const uint8_t *const *) ost->tmp_frame->data,0 , c->height, ost->frame->data,
转换 timebase 1 2 3 4 5 AVPacket *pkt = 不能为空;
打印 AVPacket 的信息 1 2 3 4 5 6 7 8 9 10 const AVFormatContext *fmt_ctx = 不能为空;const AVPacket *pkt = 不能为空;printf ("pts:%s pts_time:%s dts:%s dts_time:%s duration:%s duration_time:%s stream_index:%d\n" ,
写 AVPacket 到文件,并重置 AVPacket 1 2 3 4 const AVFormatContext *fmt_ctx = 不能为空;const AVPacket *pkt = 不能为空;int ret = av_interleaved_write_frame(fmt_ctx, pkt);
获取下一个输入样本相对于下一个输出样本将经历的延迟 1 int64_t delay = swr_get_delay(ost->swr_ctx, c->sample_rate);
使用指定的舍入重新调整 64 位整数 该运算在数学上相当于a * b / c
1 2 int dst_nb_samples = av_rescale_rnd(swr_get_delay(ost->swr_ctx, c->sample_rate) + frame->nb_samples,
转换音频 1 2 3 4 5 6 7 OutputStream *ost = 不能为空;int dst_nb_samples = 不能为空;int ret = swr_convert(ost->swr_ctx,const uint8_t **) frame->data, frame->nb_samples);
写文件尾 只能在成功调用 avformat_write_header 后调用。
1 2 3 AVFormatContext *oc = 不能为空;int ret = av_write_trailer(oc);
qsvdec This example shows how to do QSV-accelerated H.264 decoding with output frames in the GPU video surfaces.
此示例说明如何使用 GPU 视频表面中的输出帧进行 QSV 加速 H.264 解码。
获取指定的 AVCodec 1 const AVCodec *decoder = avcodec_find_decoder_by_name("h264_qsv" );
获取所需的内存 1 2 3 4 AVStream *video_st = 不能为空;uint8_t *mem = (uint8_t *) av_mallocz(video_st->codecpar->extradata_size +
remuxing API example program to remux a media file with libavformat and libavcodec.
使用 libavformat 和 libavcodec 重新混合媒体文件的 API 示例程序。
获取所需的内存 1 2 3 4 int *stream_mapping = 不能为空;int stream_mapping_size = 不能为空;int *mem = (int *) av_calloc(stream_mapping_size, sizeof (*stream_mapping));
复制 AVCodecParameters 1 2 3 4 AVStream *out_stream = 不能为空;int ret = avcodec_parameters_copy(out_stream->codecpar, in_codecpar);
resampling_audio API example program to show how to resample an audio stream with libswresample.
API 示例程序,展示如何使用 libswresample 重新采样音频流。
创建缓冲区 1 2 3 4 5 6 7 8 uint8_t **src_data = 不能为空;int src_linesize = 不能为空;int src_nb_channels = 不能为空;int src_nb_samples = 不能为空;enum AVSampleFormat src_sample_fmt =int ret = av_samples_alloc_array_and_samples(&src_data, &src_linesize, src_nb_channels,0 );
创建缓冲区 1 2 3 4 5 6 7 8 uint8_t **dst_data = 不能为空;int dst_linesize = 不能为空;int dst_nb_channels = 不能为空;int dst_nb_samples = 不能为空;enum AVSampleFormat dst_sample_fmt =int ret = av_samples_alloc(dst_data, &dst_linesize, dst_nb_channels,1 );
获取所需的内存大小 1 2 3 4 5 6 int dst_linesize = 不能为空;int dst_nb_channels = 不能为空;enum AVSampleFormat dst_sample_fmt =int dst_bufsize = av_samples_get_buffer_size(&dst_linesize, dst_nb_channels,1 );
scaling_video API example program to show how to scale an image with libswscale.
展示如何使用 libswscale 缩放图像的 API 示例程序。
解析出视频的宽高数据 1 2 3 4 const char *dst_size = 不能为空;int dst_w, dst_h;int ret = av_parse_video_size(&dst_w, &dst_h, dst_size);
获取像素格式的短名称 1 2 3 enum AVPixelFormat dst_pix_fmt =char *str = av_get_pix_fmt_name(dst_pix_fmt);
transcode_aac Simple audio converter
简单的音频转换器
1 2 3 #define OUTPUT_BIT_RATE 96000 #define OUTPUT_CHANNELS 2
1 2 const AVOutputFormat *format = av_guess_format(NULL , filename,NULL )
创建 SwrContext 并设置参数 // 为简单起见,假定基于通道数量的默认通道布局(解复用器和/或解码器有时无法正确检测到它们)。
1 2 3 4 5 6 7 8 9 10 11 12 AVCodecContext *input_codec_context = 不能为空;NULL ,0 , NULL );
创建 AVAudioFifo 1 2 3 4 5 AVAudioFifo **fifo = 不能为空;1 );
释放 AVAudioFifo 1 2 3 AVAudioFifo *fifo = 不能为空;
获取可用的样本数 1 2 3 AVAudioFifo *fifo = 不能为空;int size = av_audio_fifo_size(fifo);
获取所需的内存 1 2 3 4 5 uint8_t ***converted_input_samples = 不能为空;uint8_t **) calloc (output_codec_context->channels,sizeof (**converted_input_samples))
重新创建 AVAudioFifo 1 2 3 4 AVAudioFifo *fifo = 不能为空;const int frame_size = 不能为空;int error = av_audio_fifo_realloc(fifo, av_audio_fifo_size(fifo) + frame_size)
写数据到 AVAudioFifo 1 2 3 4 5 6 AVAudioFifo *fifo = 不能为空;uint8_t **converted_input_samples = 不能为空;const int frame_size = 不能为空;int size = av_audio_fifo_write(fifo, (void **) converted_input_samples,
从 AVAudioFifo 读数据 1 2 3 4 5 AVAudioFifo *fifo = 不能为空;const int frame_size = 不能为空;int size = av_audio_fifo_read(fifo, (void **) output_frame->data, frame_size)
写数据到文件 1 2 3 4 AVFormatContext *output_format_context = 不能为空;int error = av_write_frame(output_format_context, output_packet);
transcoding API example for demuxing, decoding, filtering, encoding and muxing
用于解复用、解码、过滤、编码和复用的 API 示例
获取 AVRational 1 2 3 4 static AVFormatContext *ifmt_ctx = 不能为空;NULL );
反转 AVRational 1 2 3 AVCodecContext *dec_ctx = 不能为空;
获取所需的内存 1 2 3 static AVFormatContext *ifmt_ctx = 不能为空;static FilteringContext *filter_ctx = (FilteringContext *) av_malloc_array(ifmt_ctx->nb_streams, sizeof (*filter_ctx));
设置 AVFilterContext 的参数 1 2 3 4 5 6 AVFilterContext *buffersink_ctx = 不能为空;int ret = av_opt_set_bin(buffersink_ctx, "pix_fmts" ,uint8_t *) &enc_ctx->pix_fmt, sizeof (enc_ctx->pix_fmt),
vaapi_encode Intel VAAPI-accelerated encoding example.
英特尔 VAAPI 加速编码示例。
创建 AVHWFramesContext 1 2 3 AVBufferRef *hw_device_ctx = 不能为空;
初始化 AVHWFramesContext 1 2 3 AVBufferRef *hw_frames_ref = 不能为空;int err = av_hwframe_ctx_init(hw_frames_ref);
创建帧的缓冲区 1 2 3 4 AVCodecContext *avctx = 不能为空;int err = av_hwframe_get_buffer(avctx->hw_frames_ctx, hw_frame, 0 )
vaapi_transcode Intel VAAPI-accelerated transcoding example.
英特尔 VAAPI 加速转码示例。