Reference
Relative positioning
| 属性 | 说明 |
|---|
| app:layout_constraintLeft_toLeftOf | 该控件以xx控件的左端为左端 |
| app:layout_constraintLeft_toRightOf | 该控件以xx控件的右端为左端 |
| app:layout_constraintRight_toLeftOf | 该控件以xx控件的左端为右端 |
| app:layout_constraintRight_toRightOf | 该控件以xx控件的右端为右端 |
| app:layout_constraintTop_toTopOf | 该控件以xx控件的上端为上端 |
| app:layout_constraintTop_toBottomOf | 该控件以xx控件的下端为上端 |
| app:layout_constraintBottom_toTopOf | 该控件以xx控件的上端为下端 |
| app:layout_constraintBottom_toBottomOf | 该控件以xx控件的下端为下端 |
| app:layout_constraintBaseline_toBaselineOf | 该控件以xx控件的基线端为基线端 |
| app:layout_constraintStart_toEndOf | 该控件以xx控件的结束端为开始端 |
| app:layout_constraintStart_toStartOf | 该控件以xx控件的开始端为开始端 |
| app:layout_constraintEnd_toStartOf | 该控件以xx控件的开始端为结束端 |
| app:layout_constraintEnd_toEndOf | 该控件以xx控件的结束端为结束端 |
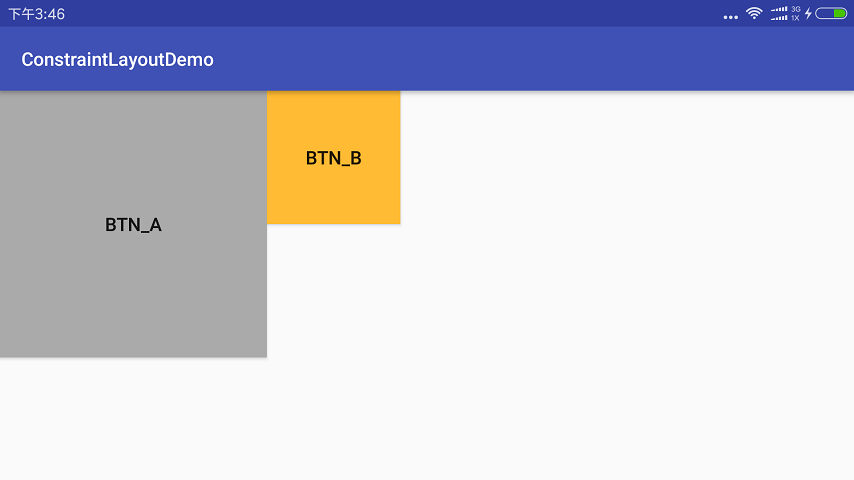
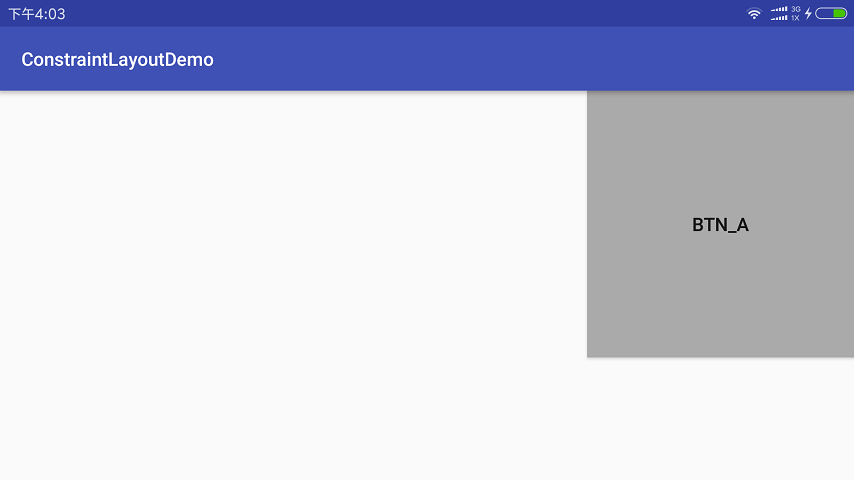
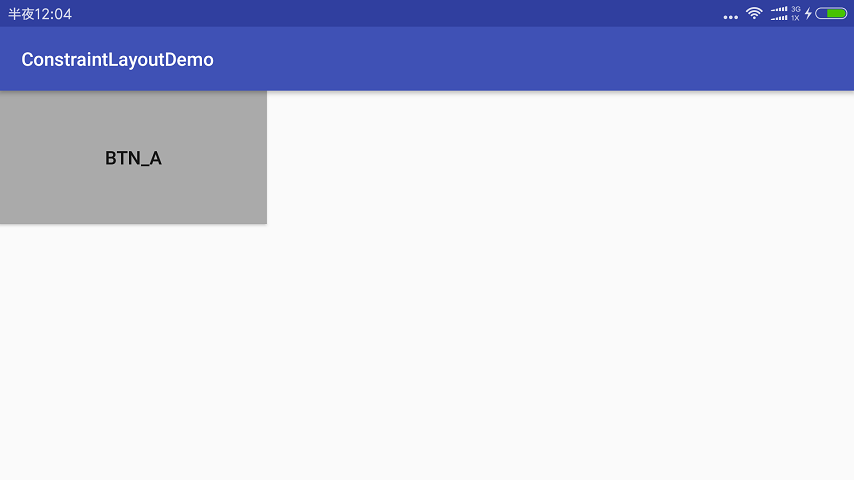
1、以app:layout_constraintLeft_toRightOf为例
布局
1
2
3
4
5
6
7
8
9
10
11
12
13
14
15
16
17
18
19
20
21
| <?xml version="1.0" encoding="utf-8"?>
<android.support.constraint.ConstraintLayout xmlns:android="http://schemas.android.com/apk/res/android"
xmlns:app="http://schemas.android.com/apk/res-auto"
android:layout_width="match_parent"
android:layout_height="match_parent">
<Button
android:id="@+id/btn_A"
android:layout_width="200dp"
android:layout_height="200dp"
android:background="@android:color/darker_gray"
android:text="btn_A" />
<Button
android:id="@+id/btn_B"
android:layout_width="100dp"
android:layout_height="100dp"
android:background="@android:color/holo_orange_light"
android:text="btn_B"
app:layout_constraintLeft_toRightOf="@id/btn_A" />
</android.support.constraint.ConstraintLayout>
|
效果
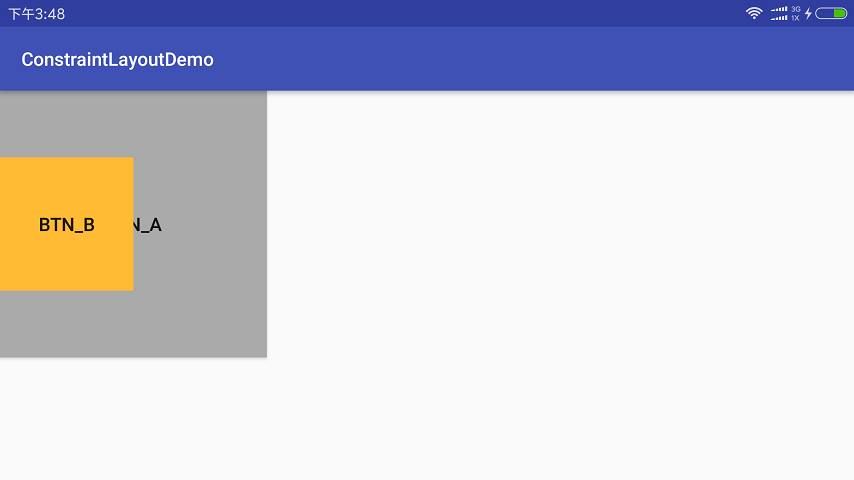
app:layout_constraintBaseline_toBaselineOf简单理解为BTN_A和BTN_B文字的底端对齐,布局修改后效果
Margins
属性|说明
–||–
android:layout_marginStart |该控件距开始端控件的间距(设置了app:layout_constraintStart_toStartOf或app:layout_constraintLeft_toLeftOf后有效)
android:layout_marginEnd |该控件距结束端控件的间距(设置了app:layout_constraintEnd_toEndOf或app:layout_constraintRight_toRightOf后有效)
android:layout_marginLeft |该控件距左端控件的间距(设置了app:layout_constraintStart_toStartOf或app:layout_constraintLeft_toLeftOf后有效)
android:layout_marginTop |该控件距上端控件的间距(设置了app:layout_constraintTop_toTopOf后有效)
android:layout_marginRight |该控件距右端控件的间距(设置了app:layout_constraintEnd_toEndOf或app:layout_constraintRight_toRightOf后有效)
android:layout_marginBottom |该控件距下端控件的间距(设置了app:layout_constraintBottom_toBottomOf后有效)
app:layout_goneMarginStart |当开始端控件的可见性为View.GONE时,该控件距开始端控件的间距
app:layout_goneMarginEnd |当结束端控件的可见性为View.GONE时,该控件距结束端控件的间距
app:layout_goneMarginLeft |当左端控件的可见性为View.GONE时,该控件距左端控件的间距
app:layout_goneMarginTop |当上端控件的可见性为View.GONE时,该控件距上端控件的间距
app:layout_goneMarginRight |当右端控件的可见性为View.GONE时,该控件距右端控件的间距
app:layout_goneMarginBottom |当下端控件的可见性为View.GONE时,该控件距下端控件的间距
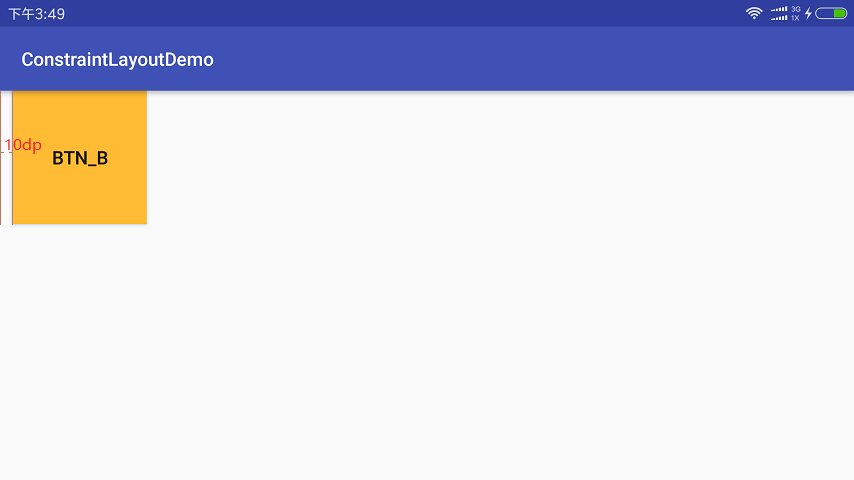
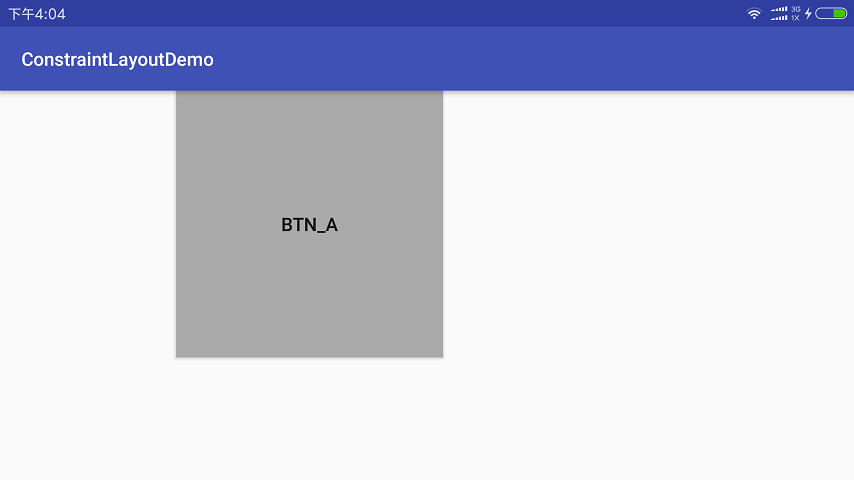
1、以app:layout_goneMarginLeft为例
布局
1
2
3
4
5
6
7
8
9
10
11
12
13
14
15
16
17
18
19
20
21
22
23
| <?xml version="1.0" encoding="utf-8"?>
<android.support.constraint.ConstraintLayout xmlns:android="http://schemas.android.com/apk/res/android"
xmlns:app="http://schemas.android.com/apk/res-auto"
android:layout_width="match_parent"
android:layout_height="match_parent">
<Button
android:id="@+id/btn_A"
android:layout_width="200dp"
android:layout_height="200dp"
android:background="@android:color/darker_gray"
android:text="btn_A"
android:visibility="gone" />
<Button
android:id="@+id/btn_B"
android:layout_width="100dp"
android:layout_height="100dp"
android:background="@android:color/holo_orange_light"
android:text="btn_B"
app:layout_constraintLeft_toRightOf="@id/btn_A"
app:layout_goneMarginLeft="10dp" />
</android.support.constraint.ConstraintLayout>
|
效果
Centering positioning
| 属性 | 说明 |
|---|
| app:layout_constraintHorizontal_bias | 该控件水平方向占位占父控件的百分比(从左端开始计算) |
| app:layout_constraintVertical_bias | 该控件垂直方向占位占父控件的百分比(从上端开始计算) |
1、以app:layout_constraintHorizontal_bias为例
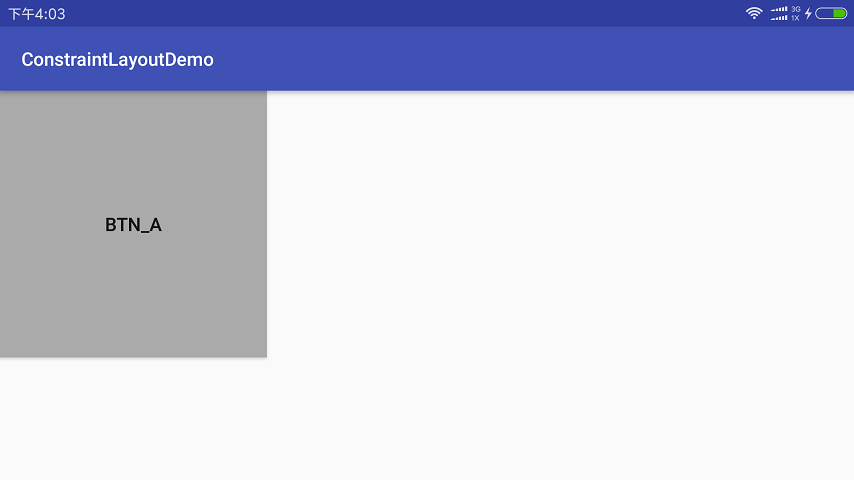
(1)当百分比为0时
布局
1
2
3
4
5
6
7
8
9
10
11
12
13
14
15
16
| <?xml version="1.0" encoding="utf-8"?>
<android.support.constraint.ConstraintLayout xmlns:android="http://schemas.android.com/apk/res/android"
xmlns:app="http://schemas.android.com/apk/res-auto"
android:layout_width="match_parent"
android:layout_height="match_parent">
<Button
android:id="@+id/btn_A"
android:layout_width="200dp"
android:layout_height="200dp"
android:background="@android:color/darker_gray"
android:text="btn_A"
app:layout_constraintHorizontal_bias="0"
app:layout_constraintLeft_toLeftOf="parent"
app:layout_constraintRight_toRightOf="parent" />
</android.support.constraint.ConstraintLayout>
|
效果
(2)当百分比为100时,修改布局参数值为1,效果
(3)当百分比为30时,修改布局参数值为0.3,效果
Circular positioning
| 属性 | 说明 |
|---|
| app:layout_constraintCircle | 该控件所围绕的“圆心”控件 |
| app:layout_constraintCircleRadius | 圆的半径 |
| app:layout_constraintCircleAngle | 旋转角度 |
布局
1
2
3
4
5
6
7
8
9
10
11
12
13
14
15
16
17
18
19
20
21
22
23
24
25
26
27
28
29
30
31
32
33
34
35
| <?xml version="1.0" encoding="utf-8"?>
<android.support.constraint.ConstraintLayout xmlns:android="http://schemas.android.com/apk/res/android"
xmlns:app="http://schemas.android.com/apk/res-auto"
android:layout_width="match_parent"
android:layout_height="match_parent">
<Button
android:id="@+id/btn_B"
android:layout_width="100dp"
android:layout_height="100dp"
android:background="@android:color/holo_orange_light"
android:text="btn_B"
app:layout_constraintBottom_toBottomOf="parent"
app:layout_constraintLeft_toLeftOf="parent"
app:layout_constraintRight_toRightOf="parent"
app:layout_constraintTop_toTopOf="parent" />
<Button
android:id="@+id/btn_C"
android:layout_width="5dp"
android:layout_height="5dp"
android:background="@android:color/darker_gray"
app:layout_constraintCircle="@id/btn_B"
app:layout_constraintCircleAngle="0"
app:layout_constraintCircleRadius="100dp" />
<Button
android:id="@+id/btn_D"
android:layout_width="5dp"
android:layout_height="5dp"
android:background="@android:color/darker_gray"
app:layout_constraintCircle="@id/btn_B"
app:layout_constraintCircleAngle="90"
app:layout_constraintCircleRadius="100dp" />
</android.support.constraint.ConstraintLayout>
|
效果

Visibility behavior
控件的 margin 属于控件自身,当控件可见性为View.GONE时,其 margin 也会失效,所以在计算layout_goneMarginLeft等时,需要加上该值
Dimension constraints
| 属性 | 说明 |
|---|
| android:layout_width | 该控件的宽度 |
| android:layout_height | 该控件的高度 |
| android:minWidth | 该控件的最小宽度(设置了android:layout_width="wrap_content"后有效) |
| android:minHeight | 该控件的最小高度(设置了android:layout_height="wrap_content"后有效) |
| android:maxWidth | 该控件的最大宽度(设置了android:layout_width="wrap_content"后有效) |
| android:maxHeight | 该控件的最大高度(设置了android:layout_height="wrap_content"后有效) |
| app:layout_constraintDimensionRatio | 该控件的宽高之比(需要宽、高至少一个是0dp) |
| app:layout_constrainedWidth | keep enforcing constraints to limit the resulting dimension |
| app:layout_constrainedHeight | keep enforcing constraints to limit the resulting dimension |
| app:layout_constraintWidth_min | 该控件的最小宽度(设置了android:layout_width="0dp"后有效) |
| app:layout_constraintHeight_min | 该控件的最小高度(设置了android:layout_height="0dp"后有效) |
| app:layout_constraintWidth_max | 该控件的最大宽度(设置了android:layout_width="0dp"后有效) |
| app:layout_constraintHeight_max | 该控件的最大高度(设置了android:layout_height="0dp"后有效) |
| app:layout_constraintWidth_percent | 该控件相对于父控件水平方向的比例 |
| app:layout_constraintHeight_percent | 该控件相对于父控件垂直方向的比例 |
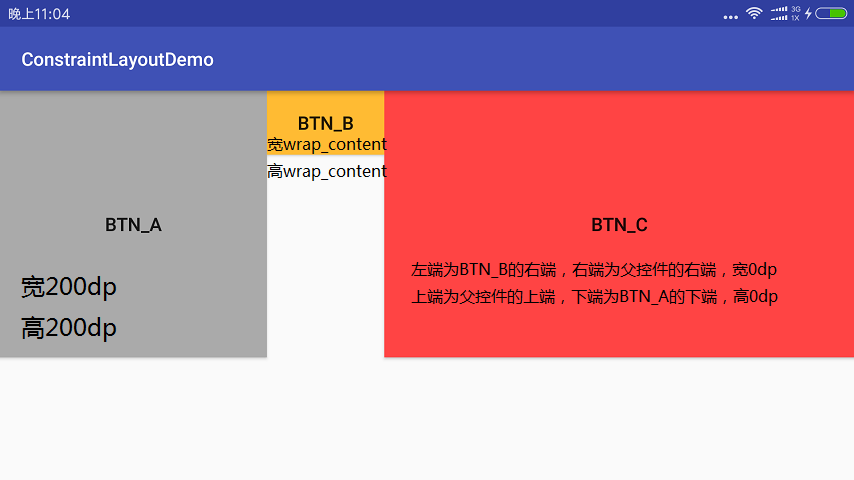
1、android:layout_width和android:layout_height取不同值时的效果
布局
1
2
3
4
5
6
7
8
9
10
11
12
13
14
15
16
17
18
19
20
21
22
23
24
25
26
27
28
29
30
31
32
| <?xml version="1.0" encoding="utf-8"?>
<android.support.constraint.ConstraintLayout xmlns:android="http://schemas.android.com/apk/res/android"
xmlns:app="http://schemas.android.com/apk/res-auto"
android:layout_width="match_parent"
android:layout_height="match_parent">
<Button
android:id="@+id/btn_A"
android:layout_width="200dp"
android:layout_height="200dp"
android:background="@android:color/darker_gray"
android:text="btn_A" />
<Button
android:id="@+id/btn_B"
android:layout_width="wrap_content"
android:layout_height="wrap_content"
android:background="@android:color/holo_orange_light"
android:text="btn_B"
app:layout_constraintLeft_toRightOf="@id/btn_A" />
<Button
android:id="@+id/btn_C"
android:layout_width="0dp"
android:layout_height="0dp"
android:background="@android:color/holo_red_light"
android:text="btn_C"
app:layout_constraintBottom_toBottomOf="@id/btn_A"
app:layout_constraintLeft_toRightOf="@id/btn_B"
app:layout_constraintRight_toRightOf="parent"
app:layout_constraintTop_toTopOf="parent" />
</android.support.constraint.ConstraintLayout>
|
效果
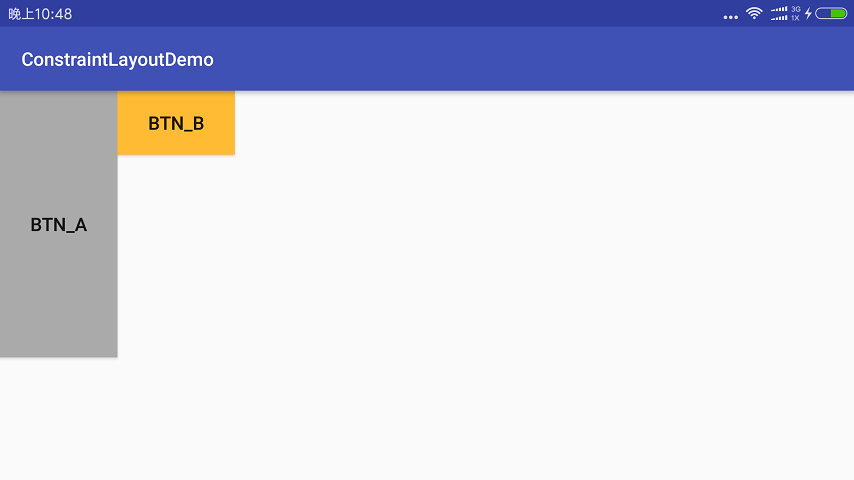
2、以android:minHeight为例
布局
1
2
3
4
5
6
7
8
9
10
11
12
13
14
15
16
17
18
19
20
21
22
| <?xml version="1.0" encoding="utf-8"?>
<android.support.constraint.ConstraintLayout xmlns:android="http://schemas.android.com/apk/res/android"
xmlns:app="http://schemas.android.com/apk/res-auto"
android:layout_width="match_parent"
android:layout_height="match_parent">
<Button
android:id="@+id/btn_A"
android:layout_width="wrap_content"
android:layout_height="wrap_content"
android:background="@android:color/darker_gray"
android:minHeight="200dp"
android:text="btn_A" />
<Button
android:id="@+id/btn_B"
android:layout_width="wrap_content"
android:layout_height="wrap_content"
android:background="@android:color/holo_orange_light"
android:text="btn_B"
app:layout_constraintLeft_toRightOf="@id/btn_A" />
</android.support.constraint.ConstraintLayout>
|
效果
3、app:layout_constraintDimensionRatio只有一个方向是0dp
布局
1
2
3
4
5
6
7
8
9
10
11
12
13
14
15
| <?xml version="1.0" encoding="utf-8"?>
<android.support.constraint.ConstraintLayout xmlns:android="http://schemas.android.com/apk/res/android"
xmlns:app="http://schemas.android.com/apk/res-auto"
android:layout_width="match_parent"
android:layout_height="match_parent">
<Button
android:id="@+id/btn_A"
android:layout_width="200dp"
android:layout_height="0dp"
android:background="@android:color/darker_gray"
android:text="btn_A"
app:layout_constraintDimensionRatio="2:1"
app:layout_constraintTop_toTopOf="parent" />
</android.support.constraint.ConstraintLayout>
|
效果
4、app:layout_constraintDimensionRatio两个方向都是0dp,可以使用W或H指定方向
布局
1
2
3
4
5
6
7
8
9
10
11
12
13
14
15
16
| <?xml version="1.0" encoding="utf-8"?>
<android.support.constraint.ConstraintLayout xmlns:android="http://schemas.android.com/apk/res/android"
xmlns:app="http://schemas.android.com/apk/res-auto"
android:layout_width="match_parent"
android:layout_height="match_parent">
<Button
android:id="@+id/btn_A"
android:layout_width="0dp"
android:layout_height="0dp"
android:background="@android:color/darker_gray"
android:text="btn_A"
app:layout_constraintBottom_toBottomOf="parent"
app:layout_constraintDimensionRatio="H,2:1"
app:layout_constraintTop_toTopOf="parent" />
</android.support.constraint.ConstraintLayout>
|
效果

5、以app:layout_constraintWidth_percent为例
布局
1
2
3
4
5
6
7
8
9
10
11
12
13
14
15
16
17
18
19
20
21
22
23
24
| <?xml version="1.0" encoding="utf-8"?>
<android.support.constraint.ConstraintLayout xmlns:android="http://schemas.android.com/apk/res/android"
xmlns:app="http://schemas.android.com/apk/res-auto"
android:layout_width="match_parent"
android:layout_height="match_parent">
<Button
android:id="@+id/btn_A"
android:layout_width="0dp"
android:layout_height="200dp"
android:background="@android:color/darker_gray"
android:text="btn_A"
app:layout_constraintLeft_toLeftOf="parent"
app:layout_constraintWidth_percent="0.3" />
<Button
android:id="@+id/btn_B"
android:layout_width="0dp"
android:layout_height="100dp"
android:background="@android:color/holo_orange_light"
android:text="btn_B"
app:layout_constraintLeft_toRightOf="@+id/btn_A"
app:layout_constraintRight_toRightOf="parent" />
</android.support.constraint.ConstraintLayout>
|
效果

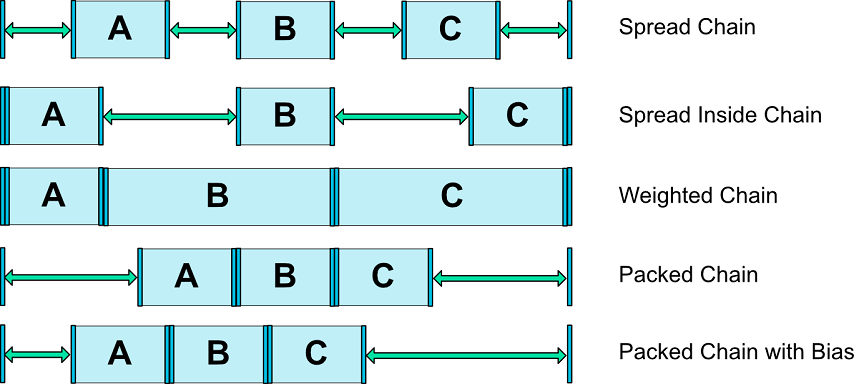
Chains
控件之间互相引用可以成为 chain
| 属性 | 说明 |
|---|
| app:layout_constraintHorizontal_chainStyle | 水平方向 chain 的样式(默认是spread) |
| app:layout_constraintVertical_chainStyle | 垂直方向 chain 的样式(默认是spread) |
| app:layout_constraintHorizontal_weight | 该控件水平方向权重(设置了android:layout_width="0dp"后有效) |
| app:layout_constraintVertical_weight | 该控件垂直方向权重(设置了android:layout_height="0dp"后有效) |
1、chain 的样式
2、构成 chain 的布局
布局
1
2
3
4
5
6
7
8
9
10
11
12
13
14
15
16
17
18
19
20
21
22
23
24
25
| <?xml version="1.0" encoding="utf-8"?>
<android.support.constraint.ConstraintLayout xmlns:android="http://schemas.android.com/apk/res/android"
xmlns:app="http://schemas.android.com/apk/res-auto"
android:layout_width="match_parent"
android:layout_height="match_parent">
<Button
android:id="@+id/btn_A"
android:layout_width="200dp"
android:layout_height="200dp"
android:layout_marginLeft="50dp"
android:background="@android:color/darker_gray"
android:text="btn_A"
app:layout_constraintLeft_toLeftOf="parent"
app:layout_constraintRight_toLeftOf="@+id/btn_B" />
<Button
android:id="@+id/btn_B"
android:layout_width="100dp"
android:layout_height="100dp"
android:background="@android:color/holo_orange_light"
android:text="btn_B"
app:layout_constraintLeft_toRightOf="@+id/btn_A"
app:layout_constraintRight_toRightOf="parent" />
</android.support.constraint.ConstraintLayout>
|
效果

3、布局去掉app:layout_constraintRight_toLeftOf="@+id/btn_B"即不能构成 chain,效果
