ClassLoader 加载 dex 文件 继承关系
BootClassLoader:
PathClassLoader:
DexClassLoader:
ClassLoader 加载 Class 的流程
双亲委托机制:
BootClassLoader#findClass() 是直接调用了 Class.classForName() 方法;
执行插件中的方法 原理
1、创建插件的 DexClassLoader 类加载器,然后通过反射获取插件的 dexElements 值;
1
2
DexClassLoader
2、获取宿主的 PathClassLoader 类加载器,然后通过反射获取宿主的 dexElements 值;
1
2
3
BaseDexClassLoader
3、合并宿主的 dexElements 与插件的 dexElements,生成新的 Element[];
核心代码 1 2 3 4 5 6 7 8 9 10 11 12 13 14 15 16 17 18 19 20 21 22 23 24 25 26 27 28 29 30 31 32 33 34 35 36 37 38 39 40 41 42 43 44 45 46 47 48 49 50 51 52 53 private boolean loadPluginDex (String apkPath) {try {Class baseDexClassLoader = Class.forName("dalvik.system.BaseDexClassLoader" );Field pathListField = baseDexClassLoader.getDeclaredField("pathList" );true );DexClassLoader dexClassLoader = new DexClassLoader (apkPath, getCacheDir().getAbsolutePath(), null , getClassLoader());Object pluginPathList = pathListField.get(dexClassLoader);Class pluginPathListClass = pluginPathList.getClass();Field pluginDexElementsField = pluginPathListClass.getDeclaredField("dexElements" );true );PathClassLoader pathClassLoader = (PathClassLoader) getClassLoader();Object hostPathList = pathListField.get(pathClassLoader);Class hostPathListClass = hostPathList.getClass();Field hostDexElementsField = hostPathListClass.getDeclaredField("dexElements" );true );0 , dexElements, 0 , pluginDexElements.length);0 , dexElements, pluginDexElements.length, hostDexElements.length);return true ;catch (Exception e) {return false ;private String loadPluginMethod () {try {"io.weichao.plugin.util.PluginUtil" );Method method = threadClazz.getMethod("getMessage" );return (String) method.invoke(null );catch (Exception e) {return null ;
启动插件中的 Activity 关键难点——无法通过 AMS 检测 插件的 Activity 没有在宿主的清单文件中注册。
启动 Activity 流程
绕过 AMS 检测——hook hook:
1、在宿主中创建一个 ProxyActivity 继承自 Activity,并且在 manifest 中注册;
1 2 3 4 5 6 7 8 9 10 11 12 13 14 15 16 17 18 19 20 21 22 23 24 25 26 27 28 29 30 31 32 33 34 35 36 37 38 39 40 41 42 43 44 45 46 47 48 49 50 51 52 53 54 55 56 57 58 59 60 61 62 63 64 65 66 67 68 69 70 public static IActivityManager getService () {return IActivityManagerSingleton.get();private static final Singleton<IActivityManager> IActivityManagerSingleton = new Singleton <IActivityManager>() {@Override protected IActivityManager create () {final IBinder b = ServiceManager.getService(Context.ACTIVITY_SERVICE);final IActivityManager am = IActivityManager.Stub.asInterface(b);return am;public abstract class Singleton <T> {private T mInstance;protected abstract T create () ;public final T get () {synchronized (this ) {if (mInstance == null ) {return mInstance;static public IActivityManager getDefault () {return gDefault.get();private static final Singleton<IActivityManager> gDefault = new Singleton <IActivityManager>() {protected IActivityManager create () {IBinder b = ServiceManager.getService("activity" );if (false ) {"ActivityManager" , "default service binder = " + b);IActivityManager am = asInterface(b);if (false ) {"ActivityManager" , "default service = " + am);return am;
3、在 AMS 检测完后,找到一个 hook 点,然后通过 hook 将启动 ProxyActivity 的 Intent 替换成启动插件 Activity 的 Intent;
1 2 3 4 5 6 7 8 9 10 11 12 13 14 15 16 17 18 19 20 21 22 23 24 25 26 27 28 29 30 31 32 33 34 35 36 37 final H mH = new H ();private static volatile ActivityThread sCurrentActivityThread;new Intent (r.intent), ...)
4、启动插件的 Activity。
核心代码 将启动插件 Activity 的 Intent 替换成启动 ProxyActivity 的 Intent 1 2 3 4 5 6 7 8 9 10 11 12 13 14 15 16 17 18 19 20 21 22 23 24 25 26 27 28 29 30 31 32 33 34 35 36 37 38 39 40 41 42 43 44 45 46 47 48 49 50 51 52 53 54 55 56 57 58 59 60 61 62 63 64 65 66 67 68 try {Object singleton = null ;if (Build.VERSION.SDK_INT >= Build.VERSION_CODES.O) {"android.app.ActivityManager" );Field singletonField = clazz.getDeclaredField("IActivityManagerSingleton" );true );null );else {"android.app.ActivityManagerNative" );Field singletonField = clazz.getDeclaredField("gDefault" );true );null );"android.util.Singleton" );Field mInstanceField = singletonClass.getDeclaredField("mInstance" );true );final Object mInstance = mInstanceField.get(singleton);"android.app.IActivityManager" );Object proxyInstance = Proxy.newProxyInstance(Thread.currentThread().getContextClassLoader(),new Class []{iActivityManagerClass}, new InvocationHandler () {@Override public Object invoke (Object proxy, Method method, Object[] args) throws Throwable {if ("startActivity" .equals(method.getName())) {int index = 0 ;for (int i = 0 ; i < args.length; i++) {if (args[i] instanceof Intent) {break ;Intent intent = (Intent) args[index];Intent proxyIntent = new Intent ();"io.weichao.plugin_demo" , ProxyActivity.class.getName());return method.invoke(mInstance, args);catch (Exception e) {"aaaaa" , "aaaaa" + e.getMessage());
将启动 ProxyActivity 的 Intent 替换成启动插件 Activity 的 Intent 1 2 3 4 5 6 7 8 9 10 11 12 13 14 15 16 17 18 19 20 21 22 23 24 25 26 27 28 29 30 31 32 33 34 35 36 37 38 39 40 41 42 43 44 45 46 47 48 49 50 51 52 53 54 55 56 57 58 59 60 61 62 63 64 65 66 67 68 69 70 try {"android.app.ActivityThread" );Field sCurrentActivityThreadField = clazz.getDeclaredField("sCurrentActivityThread" );true );Object activityThread = sCurrentActivityThreadField.get(null );Field mHField = clazz.getDeclaredField("mH" );true );Object mH = mHField.get(activityThread);"android.os.Handler" );Field mCallbackField = handlerClass.getDeclaredField("mCallback" );true );new Handler .Callback() {@Override public boolean handleMessage (@NonNull Message msg) {switch (msg.what) {case 100 :try {Field intentField = msg.obj.getClass().getDeclaredField("intent" );true );Intent proxyIntent = (Intent) intentField.get(msg.obj);Intent intent = proxyIntent.getParcelableExtra(TARGET_INTENT);if (intent != null ) {catch (Exception e) {"aaaaa" , "aaaaa" + e.getMessage());break ;case 159 :try {"android.app.servertransaction.ClientTransaction" );Field mActivityCallbacksField = clazz.getDeclaredField("mActivityCallbacks" );true );List activityCallbacks = (List) mActivityCallbacksField.get(msg.obj);for (int i = 0 ; i < activityCallbacks.size(); i++) {if (activityCallbacks.get(i).getClass().getName() .equals("android.app.servertransaction.LaunchActivityItem" )) {Object launchActivityItem = activityCallbacks.get(i);Field mIntentField = launchActivityItem.getClass().getDeclaredField("mIntent" );true );Intent proxyIntent = (Intent) mIntentField.get(launchActivityItem);Intent intent = proxyIntent.getParcelableExtra(TARGET_INTENT);if (intent != null ) {break ;catch (Exception e) {"aaaaa" , "aaaaa" + e.getMessage());break ;return false ;catch (Exception e) {"aaaaa" , "aaaaa" + e.getMessage());
启动插件的 Activity 1 2 3 Intent intent = new Intent ();new ComponentName ("io.weichao.plugin" , "io.weichao.plugin.activity.MainActivity" ));
让插件中的 Activity 加载插件中的资源 前期铺垫 1、加载 res 中的资源是通过 Resources,但是最后也是调用 AssetManager,只是会先通过 id 查找。AssetManager 可以加载未编译过的资源。
1 2 3 4 5 6 7 8 9 10 11 12 13 14 15 getResources().getString(R.string.app_name);public String getString (@StringRes int id) throws NotFoundException {return getText(id).toString();@NonNull public CharSequence getText (@StringRes int id) throws NotFoundException {CharSequence res = mResourcesImpl.getAssets().getResourceText(id);if (res != null ) {return res;throw new NotFoundException ("String resource ID #0x"
2、启动 Activity 时会调用 ActivityThread#performLaunchActivity(),此时建立了 Resources、AssetManager 和 Context 的绑定关系,并且指定了资源目录。
1 2 3 4 5 6 7 8 9 10 11 12 13 14 15 16 17 private Activity performLaunchActivity (ActivityClientRecord r, Intent customIntent) {ContextImpl appContext = createBaseContextForActivity(r);return activity;private ContextImpl createBaseContextForActivity (ActivityClientRecord r) {ContextImpl appContext = ContextImpl.createActivityContext(this , r.packageInfo, r.activityInfo, r.token, displayId, r.overrideConfig);return appContext;
1 2 3 4 5 6 7 8 9 10 11 12 13 14 15 16 17 18 19 20 21 static ContextImpl createActivityContext (ActivityThread mainThread, LoadedApk packageInfo, ActivityInfo activityInfo, IBinder activityToken, int displayId, Configuration overrideConfiguration) {ContextImpl context = new ContextImpl (null , mainThread, packageInfo, activityInfo.splitName, activityToken, null , 0 , classLoader);final ResourcesManager resourcesManager = ResourcesManager.getInstance();return context;
1 2 3 4 5 6 7 8 9 10 11 12 13 14 15 16 17 18 19 20 21 22 23 24 25 26 27 28 29 30 31 32 33 34 35 36 37 38 39 40 41 42 public @Nullable Resources createBaseActivityResources (@NonNull IBinder activityToken, @Nullable String resDir, @Nullable String[] splitResDirs, @Nullable String[] overlayDirs, @Nullable String[] libDirs, int displayId, @Nullable Configuration overrideConfig, @NonNull CompatibilityInfo compatInfo, @Nullable ClassLoader classLoader) {return getOrCreateResources(activityToken, key, classLoader);private @Nullable Resources getOrCreateResources (@Nullable IBinder activityToken, @NonNull ResourcesKey key, @NonNull ClassLoader classLoader) {ResourcesImpl resourcesImpl = createResourcesImpl(key);private @Nullable ResourcesImpl createResourcesImpl (@NonNull ResourcesKey key) {final AssetManager assets = createAssetManager(key);final ResourcesImpl impl = new ResourcesImpl (assets, dm, config, daj);return impl;protected @Nullable AssetManager createAssetManager (@NonNull final ResourcesKey key) {AssetManager assets = new AssetManager ();if (key.mResDir != null ) {if (assets.addAssetPath(key.mResDir) == 0 ) {"failed to add asset path " + key.mResDir);return null ;
原理 创建 AssetManager,反射 addAssetPath 方法设置插件的资源目录; 创建 Resources,绑定该 AssetManager; 在 Application 中重写 getResources(),使用该 Resources; 在插件的 Activity 中重写 getResources(),使用 Application 中的 Resources。 核心代码 1 2 3 4 5 6 7 8 9 10 11 12 13 14 15 public static Resources loadResource (Context context) {try {AssetManager assetManager = AssetManager.class.newInstance();Method addAssetPathMethod = assetManager.getClass().getDeclaredMethod("addAssetPath" , String.class);true );Resources resources = context.getResources();return new Resources (assetManager, resources.getDisplayMetrics(), resources.getConfiguration());catch (Exception e) {return null ;
1 2 3 4 5 6 7 8 9 10 11 12 13 14 public class MyApplication extends Application {private Resources resources;@Override public void onCreate () {super .onCreate();this );@Override public Resources getResources () {return resources == null ? super .getResources() : resources;
1 2 3 4 5 6 7 8 9 10 public class MainActivity extends Activity {@Override public Resources getResources () {if (getApplication() != null && getApplication().getResources() != null ) {return getApplication().getResources();return super .getResources();
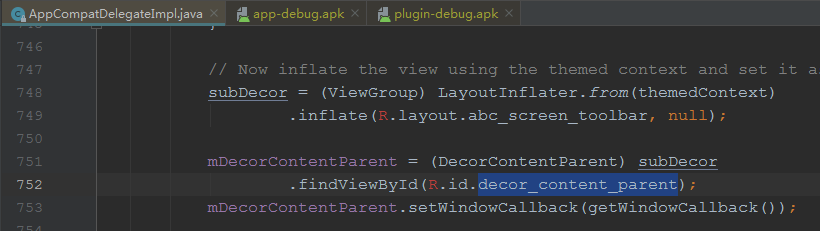
当宿主的 Activity 和插件的 Activity 都继承于 AppCompatActivity 时会报错 1 2 3 4 5 6 7 8 9 10 11 12 13 14 15 16 17 18 19 20 21 22 23 24 25 26 27 28 29 30 31 32 33 34 java.lang.RuntimeException: Unable to start activity ComponentInfo{io.weichao.plugin/io.weichao.plugin.activity.MainActivity}: java.lang.NullPointerException: Attempt to invoke interface method 'void androidx.appcompat.widget.DecorContentParent.setWindowCallback(android.view.Window$Callback)' on a null object reference
报错的原因 当宿主和插件都使用 AppCompatActivity 时,由于编译时会将资源建立映射关系,在宿主和插件中分别建立了 1 次映射关系,且这 2 次映射关系基本上不会相同。在宿主中 key1 -> value1,在插件中 key2 -> value2。
解决办法 让插件使用自己的 Resource。
1 2 3 4 5 6 7 8 9 10 11 12 13 14 15 16 17 18 19 20 21 22 public class MainActivity extends AppCompatActivity {protected Context mContext;@Override protected void onCreate (Bundle savedInstanceState) {super .onCreate(savedInstanceState);Resources resource = LoadUtil.getResource(getApplication());new ContextThemeWrapper (getBaseContext(), 0 );extends Context > clazz = mContext.getClass();try {Field mResourcesField = clazz.getDeclaredField("mResources" );true );catch (Exception e) {View view = LayoutInflater.from(mContext).inflate(R.layout.activity_main, null );