为 Hexo + Fluid 博客添加承载相册的页面
本文最后更新于:1 年前
Reference
TODO
- 我想要的相册 tab 是 https://gishai.top/blog/photos/ 所展示的这样,Fluid 博主在博客[1]分享出来的是书签形式的,不是这种标签形式的。我还没有实现出来。
mp4 文件宽高信息获取。- 相册在页面中显示的顺序是无序的,需要修改为有序的。
版本信息
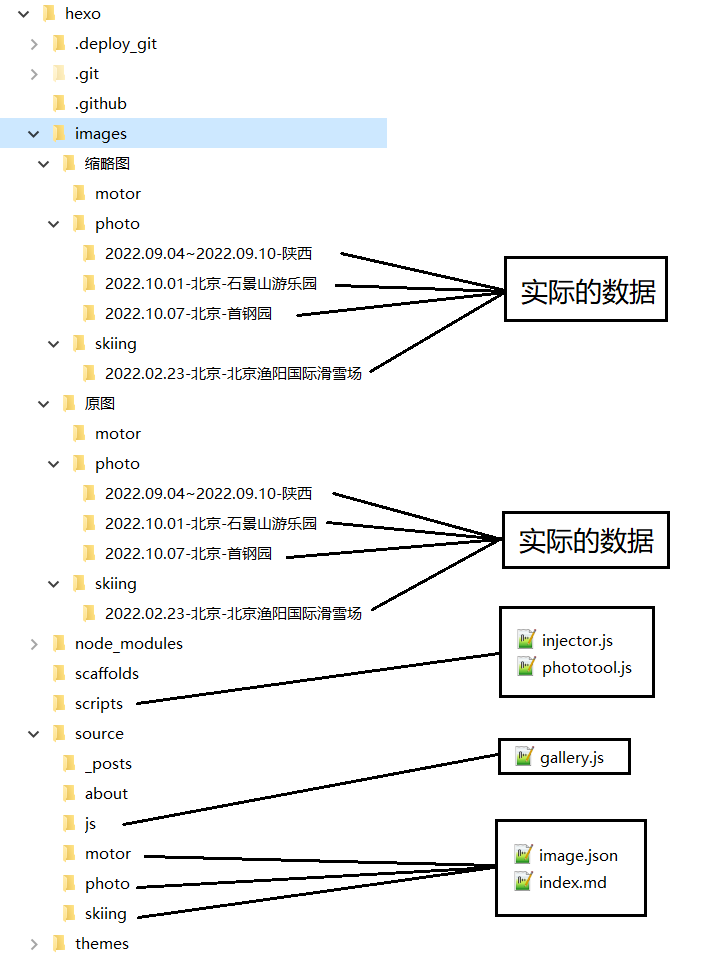
完整的文件目录结构
因为涉及的文件比较多,把完整的文件目录结构看一下 只展开相对于 Hexo 的增量部分,然后再逐步实现细节:
创建相册的页面
比如我需要创建 photo 页面,执行 Hexo 命令:
1 | |
会创建 source/photo,里面有一个文件 index.md。
motor 页面、skiing 页面和 photo 页面同理。
index.md 文件的默认内容由 scaffolds/page.md 决定。
修改 index.md 关键是 layout: photo,这个 photo 和 photo 页面不是一回事,设置时没注意所以重名了:
1 | |
在 _config.fluid.yml 文件的 menu 里添加页面的访问入口:
1 | |
准备图片
处理图片
先把图片在 NAS 中用 Qfiling 处理一遍,处理后生成原图和缩略图。
缩略图里的文件名和扩展名都和原图里的一致。
因为预览时设置了缩略图的最大宽度为 240,按照竖向图片高宽比 2:1 计算,宽度、高度均不超 480,长宽比不变即可。
这里有一个坑:
视频文件生成不了缩略图,只能自己截图(phototool.js 只处理了 png 格式,所以图片只能是 png 文件,且宽高数据需要和视频一致,否则加载时会有问题),然后把视频和截图的 png 一起放到对应的文件夹里,让 Qfiling 处理,处理后的文件需要删除缩略图里的视频和 png,把原图里的 png 作为缩略图使用,毕竟视频的宽高一般都不太大。

原图和缩略图里分别有3个文件夹 motor、photo、skiing 对应3个页面,每个页面里可以放多个相册。
图片可以放在 source 内对应页面的文件夹里,也可以放在图床。
放在 source 内的文件会在执行 hexo g 命令时放进 public,最终会被上传到 GitHub 如果使用了 Github Pages。
上传图片到图床
我的图片是放在腾讯的图床,所以可以在 Hexo 的根目录创建文件夹 images。
把处理后的原图和缩略图复制到 images。
然后上传图片到图床,上传时不能按照页面上传,要按照相册上传,否则后面 image.json 还得处理: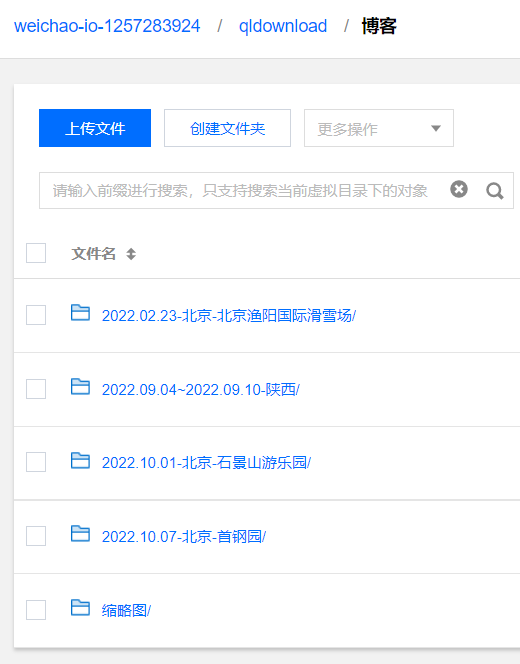
安装 image-size
image-size 的功能是获取图片的宽高信息不支持获取非图片格式的宽高,比如视频。
执行命令:
1 | |
使用 phototool.js 生成 image.json
image.json 的作用是建立图片和相册、页面的索引。
NexT 博主的页面是平铺的,没有相册概念,所以 phototool.js[2] 生成的 json 是一层的:
1 | |
Fluid 博主的页面是两层的,使用 create.js 生成:
1 | |
但是这个 create.js 文件博主没有分享出来,我参考 phototool.js 和 index.js[3] 写了一个新的 phototool.js,除了实现 create.js 的功能,还实现了:
- 在每个图片后面添加了一个值,作为图片对应的缩略图。
- 支持了获取 image-size 不支持的格式的宽高信息 除了 mp4 文件还可以随意添加。
具体实现方式就是如果文件是这些不支持的文件格式,就使用对应的缩略图中的 png 的宽高信息。
1 | |
生成的 json 格式:
1 | |
手动执行命令 验证用,后续会自动执行,会在 source 内对应页面的文件夹内生成 image.json:
1 | |
放在 scripts 内的 js 文件在执行 Hexo 部分命令 比如 hexo s -d 时会被自动执行。
至此,图片的准备工作就做完了。
加载图片到页面
创建 gallery.js
参考的是 Fluid 博主的 photoWall.js,代码的主要功能是:
- 读取
iamge.json文件内的 json 数据:name的值加载到index.md的imageTab上。children的图片加载到index.md的ImageGrid上。
- 图片加载使用了 lazyload[4],src 设置为使用数据 uri 图像作为占位符,以减少请求量。
我做了部分修改,重命名为 gallery.js,修改如下:
- 使用了之前上传到图床的缩略图,这样显示的的图片会很清晰,而且支持了视频。
photoWall.js给 lazyload 设置的 data-src 是原图,在图片加载后会显示特别糊的缩略图,估计是代码生成的,但是生成的图片质量远不如上传的缩略图;而且不支持生成视频缩略图。
1 | |
执行 gallery.js
这里用到了 Hexo 注入器[5],使用的是 Fluid 博主的代码 injector.js,稍作修改。
在 layout: photo 时会导入下面的 js 与 css,这里的 layout 就是 index.md 里的 layout,其中包括 gallery.js:
1 | |
参考
- hexo的fluid主题添加瀑布流懒加载相册功能:https://gishai.top/blog/posts/798ba833.html ↩
- Hexo NexT 博客增加瀑布流相册页面:https://pinlyu.com/posts/31/ ↩
- leirock/image-size-generator/index.js:https://github.com/leirock/image-size-generator/blob/main/index.js ↩
- vvo/lazyload:https://github.com/vvo/lazyload ↩
- Hexo 注入代码:https://hexo.fluid-dev.com/docs/advance/#hexo-%E6%B3%A8%E5%85%A5%E4%BB%A3%E7%A0%81 ↩