编译、运行源码
本文最后更新于:1 年前
Reference
软、硬件环境
PC

手机
Pixel XL 欧版 32GB 银色
构建编译环境
安装 Git 并配置用户名、密码
在命令行运行:
$ sudo apt-get install git
$ git config --global user.email "[email protected]"
$ git config --global user.name "xx"
安装 JDK
在命令行运行:
$ sudo apt-get update
$ sudo apt-get install openjdk-8-jdk
安装依赖
在命令行运行:
$ sudo apt-get install libx11-dev:i386 libreadline6-dev:i386 libgl1-mesa-dev g++-multilib
$ sudo apt-get install -y git flex bison gperf build-essential libncurses5-dev:i386
$ sudo apt-get install tofrodos python-markdown libxml2-utils xsltproc zlib1g-dev:i386
$ sudo apt-get install dpkg-dev libsdl1.2-dev libesd0-dev
$ sudo apt-get install git-core gnupg flex bison gperf build-essential
$ sudo apt-get install zip curl zlib1g-dev gcc-multilib g++-multilib
$ sudo apt-get install libc6-dev-i386
$ sudo apt-get install lib32ncurses5-dev x11proto-core-dev libx11-dev
$ sudo apt-get install libgl1-mesa-dev libxml2-utils xsltproc unzip m4
$ sudo apt-get install lib32z-dev ccache
下载源码
安装 Repo 工具
Repo 工具通过调用 Git 命令实现对 AOSP 的管理。
确保主目录下有一个 bin/ 目录,并且该目录包含在路径中
在命令行运行:
 $ mkdir ~/bin
 $ PATH=~/bin:$PATH
下载 Repo 工具,并确保它可执行
在命令行运行:
 $ curl https://storage.googleapis.com/git-repo-downloads/repo > ~/bin/repo
 $ chmod a+x ~/bin/repo
注意!以下 URL 不可用:
$ curl https://storage-googleapis.lug.ustc.edu.cn/git-repo-downloads/repo > ~/bin/repo否则会报错:
 line 1: html: No such file or directory
 line 2: syntax error near unexpected token `<'
 line 2: `<head><title>301 Moved Permanently</title></hea'>
如果下载失败,原因是未翻墙,可在别处下载好并复制到特定目录中
在命令行运行:
$ cp repo ~/bin
同步源码
下载初始化包
在命令行运行:
$ wget https://mirrors.tuna.tsinghua.edu.cn/aosp-monthly/aosp-latest.tar解压缩下载的 tar 文件
在命令行运行:
$ tar xf aosp-latest.tar进入 aosp 目录
在命令行运行:
$ cd aosp修改 repo 文件
在命令行运行:
$ sudo gedit ~/bin/repo修改
REPO_URL = 'https://gerrit.googlesource.com/git-repo'为REPO_URL = 'https://gerrit-google.tuna.tsinghua.edu.cn/git-repo'否则同步源码树时会报错:
 fatal: unable to access 'https://gerrit.googlesource.com/git-repo/': Failed to connect to gerrit.googlesource.com port 443: Connection timed out
 fatal: unable to access 'https://gerrit.googlesource.com/git-repo/': Failed to connect to gerrit.googlesource.com port 443: Connection timed out
 error: Cannot fetch repo
查询版本
登录源代码标记和细分版本查看,比如 Pixel XL 最新的是 android-7.1.1_r26。
设置获取的源码的版本
在命令行运行:
$ repo init -b android-7.1.1_r26同步源码树
在命令行运行:
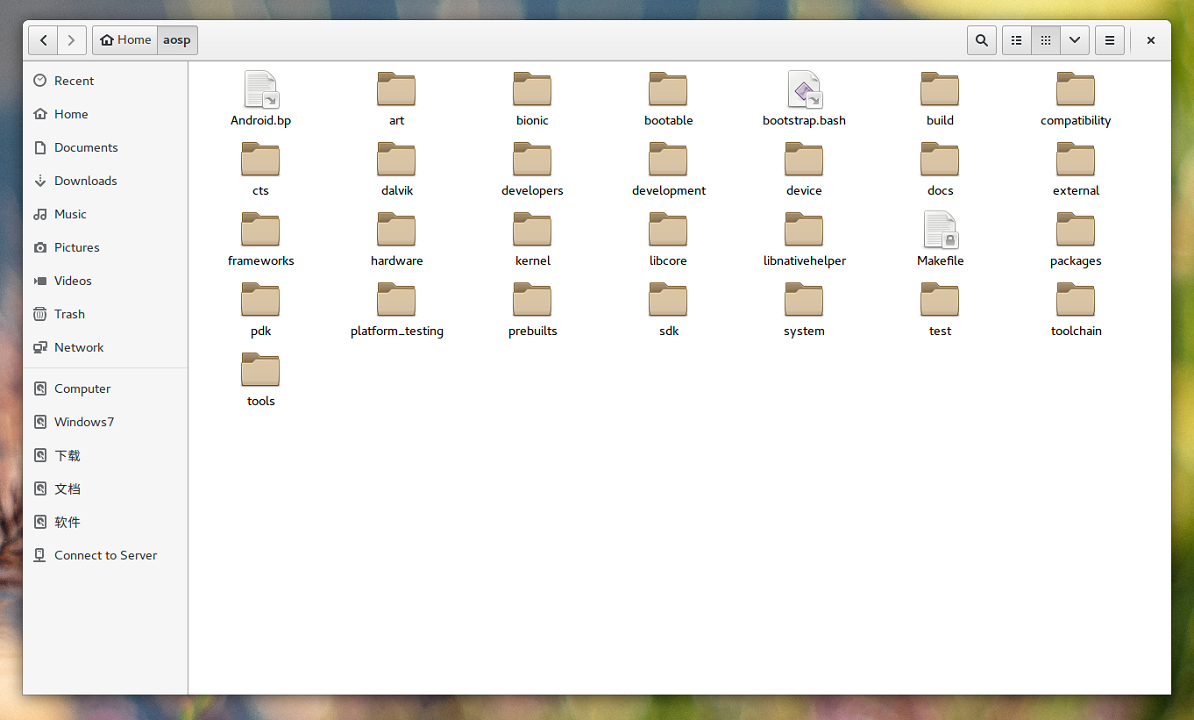
$ repo sync同步完成后 aosp 会显示内容

编译源码
设置环境
执行 envsetup.sh 脚本
在命令行运行:
$ source build/envsetup.sh
设置目标
获取目标
目标就是生成的镜像要运行在什么样的设备上。
登录选择设备编译系统查看,BUILD 为
aosp_x86_64对应 Intel 平台的模拟器,BUILD 为aosp_marlin对应 Pixel XL。BUILD 包含
arm,表示系统运行在 arm 架构的处理器上,arm64表示系统运行在 64 位 arm 架构的处理器上。x86和mips同理。BUILDTYPE 是
user,表示编译出的系统镜像是可以用来正式发布到市场的版本,没有 root 权限和 debug 权限。userdebug表示有 root 权限和 debug 权限。eng表示系统镜像是开发版,有最大的权限。在命令行运行:
$ lunch会打印出所有目标,通过输入序号可以选择目标:
 You're building on Linux

 Lunch menu... pick a combo:
      1. aosp_arm-eng
      2. aosp_arm64-eng
      3. aosp_mips-eng
      4. aosp_mips64-eng
      5. aosp_x86-eng
      6. aosp_x86_64-eng
      7. full_fugu-userdebug
      8. aosp_fugu-userdebug
      9. car_emu_arm64-userdebug
      10. car_emu_arm-userdebug
      11. car_emu_x86_64-userdebug
      12. car_emu_x86-userdebug
      13. mini_emulator_arm64-userdebug
      14. m_e_arm-userdebug
      15. m_e_mips64-eng
      16. m_e_mips-userdebug
      17. mini_emulator_x86_64-userdebug
      18. mini_emulator_x86-userdebug
      19. uml-userdebug
      20. aosp_dragon-userdebug
      21. aosp_dragon-eng
      22. aosp_marlin-userdebug
      23. aosp_marlin_svelte-userdebug
      24. aosp_sailfish-userdebug
      25. aosp_angler-userdebug
      26. aosp_bullhead-userdebug
      27. aosp_bullhead_svelte-userdebug
      28. hikey-userdebug
      29. hikey960-userdebug

 Which would you like? [aosp_arm-eng] 6

 ============================================
 PLATFORM_VERSION_CODENAME=P
 PLATFORM_VERSION=P
 TARGET_PRODUCT=aosp_x86_64
 TARGET_BUILD_VARIANT=eng
 TARGET_BUILD_TYPE=release
 TARGET_PLATFORM_VERSION=PPR1
 TARGET_BUILD_APPS=
 TARGET_ARCH=x86_64
 TARGET_ARCH_VARIANT=x86_64
 TARGET_CPU_VARIANT=
 TARGET_2ND_ARCH=x86
 TARGET_2ND_ARCH_VARIANT=x86_64
 TARGET_2ND_CPU_VARIANT=
 HOST_ARCH=x86_64
 HOST_2ND_ARCH=x86
 HOST_OS=linux
 HOST_OS_EXTRA=Linux-4.4.0-59-generic-x86_64-Ubuntu-16.04.1-LTS
 HOST_CROSS_OS=windows
 HOST_CROSS_ARCH=x86
 HOST_CROSS_2ND_ARCH=x86_64
 HOST_BUILD_TYPE=release
 BUILD_ID=OC
 OUT_DIR=out
 AUX_OS_VARIANT_LIST=
 ============================================
也可以直接选择目标
在命令行运行:
$ lunch aosp_x86_64-eng设置 8 个线程参与编译,并开始编译
在命令行运行:
$ make -j8当看到
#### build completed successfully (01:45:47 (hh:mm:ss)) ####即表示编译成功,括号内为编译共计耗时。
运行
在模拟器中运行
如果不是刚刚执行过编译,则需要在命令行运行:
 $ source build/envsetup.sh
 $ lunch aosp_x86_64-eng
运行
在命令行运行:
$ emulator -memory 2048 -partition-size 4096运行成功:

配置参数
增加 system/data 分区大小
在命令行运行:
$ emulator -partition-size 4096否则会报错:
 emulator: WARNING: system partition size adjusted to match image file (2048 MB > 200 MB)
 emulator: WARNING: data partition size adjusted to match image file (550 MB > 200 MB)
增加 RAM 大小
在命令行运行:
$ emulator -memory 2048否则会报错:
emulator: WARNING: Increasing RAM size to 1GB设置成功:

模拟器运行所需要的 4 个文件包括:
Linux Kernel、system.img、userdate.img、ramdisk.img。
aosp_arm-eng 使用的是 prebuilds/qemu-kernel/arm/kernel-qemu 目录中的
Linux Kernel,out/target/product/generic 目录中的system.img、userdate.img、ramdisk.img。
aosp_arm64-eng 使用的是 prebuilds/qemu-kernel/arm64/kernel-qemu 目录中的
Linux Kernel,out/target/product/generic64 目录中的system.img、userdate.img、ramdisk.img。
模块编译
编译 Launcher2 模块
在命令行运行:
$ mmm packages/apps/Launcher2/编译生成的 apk 文件位置:
out/target/product/对应平台的generic文件夹/data/app/LauncherRotationStressTest/LauncherRotationStressTest.apkTODO
- 执行
mmm packages/apps/Launcher2/应该生成out/target/product/gereric/system/app/Launcher2.apk,但是实际生成的是out/target/product/generic_x86_64/data/app/LauncherRotationStressTest/LauncherRotationStressTest.apk,经查询,该文件对应的是 Launcher3。
- 执行
编译 Launcher3 模块
在命令行运行:
$ mma packages/apps/Launcher3/不能使用
mmm packages/apps/Launcher3/,否则会报错:ninja: error: 'out/host/linux-x86/framework/host-libprotobuf-java-nano.jar', needed by 'out/host/common/obj/JAVA_LIBRARIES/launcher_proto_lib_intermediates/classes-full-debug.jar', missing and no known rule to make it build/core/ninja.mk:148: recipe for target 'ninja_wrapper' failedTODO
- 找不到 apk 文件。
安装 apk 文件
在命令行运行(比如 64 位 Intel 平台):
adb install out/target/product/generic_x86_64/data/app/LauncherRotationStressTest/LauncherRotationStressTest.apk重新打包 apk 文件到系统镜像中
在命令行运行:
make snod
系统自带应用的 apk 文件的位置: out/target/product/对应平台的generic文件夹/system/app
可执行文件的位置: out/target/product/对应平台的generic文件夹/system/bin
动态链接库文件的位置: out/target/product/对应平台的generic文件夹/system/lib
硬件抽象层文件的位置: out/target/product/对应平台的generic文件夹/system/lib/hw